Its been quite a while since my original iPad workflow post. Software has improved and the speed of the iPad Pro has totally changed the game so of course, my iPad workflow has moved on quite a bit.
The first stage of my workflow continues to be ShutterSnitch. In my opinion this is still the fastest, most reliable method of using the WiFi connection to get the images from the Fujis on to the iPad. When I am sending just a few images (or sending a few at a time as a job progresses) , I can select on the camera and transfer individually via WiFi with ShutterSnitch instantly saving the images to the iPad Camera Roll. The problem comes when I have Job that involves many hundreds of images, all of which have to be looked at, selected then basic edits made, metadata (caption etc) added and sent. WiFi is just not fast enough for this many images. This is the problem I faced when travelling to Cannes for the annual film festival.
As I was flying and would also be carrying my kit most of the day I really wanted to keep weight to a minimum so I decided to stick with the iPad and develop a workflow that would work.
My iPad is a 256GB/4G model and so has more storage than my old MacBook, even so I was paranoid about storage at the start and wanted to ensure the iPad only contained the images that were “keepers” so my workflow actually started with the camera configuration. I decided to shoot JPG only on to 64GB cards in both slots – slot 1 as the primary storage and slot 2 for backup. At the end of each job (or day) I would ingest the images to the camera roll from the slot 1 card using the standard apple camera connection key. The card was always wiped after ingest. The card in slot 2 remained in place, building a backup of all the image files, only being switched out to my suitcase as it became full. (Note: RAW image files could be used but would be slower).
When working on a full Laptop/Desktop it is common for most press photographers to use Photomechanic to select and caption first before transferring only their “keepers” to their editing software (photoshop or Lightroom). Because of the way iOS protects files and stops apps interacting on the same data, my workflow is actually the reverse. I use Lightroom mobile to select and edit before captioning and sending in PicturePro.
Lightroom Mobile (on Creative Cloud).
There are a number of key settings / stages to make this reasonably quick.
Mobile data: Ensure “sync on mobile data” is turned off. (Tethering to a phone brings a whole different set of issues as you really do not want LR to try and synchronise all images until back at base). An iPad on its own 4G connection is a real advantage here and simplifies the sending process.
Collections: Keep a collection per job or day.
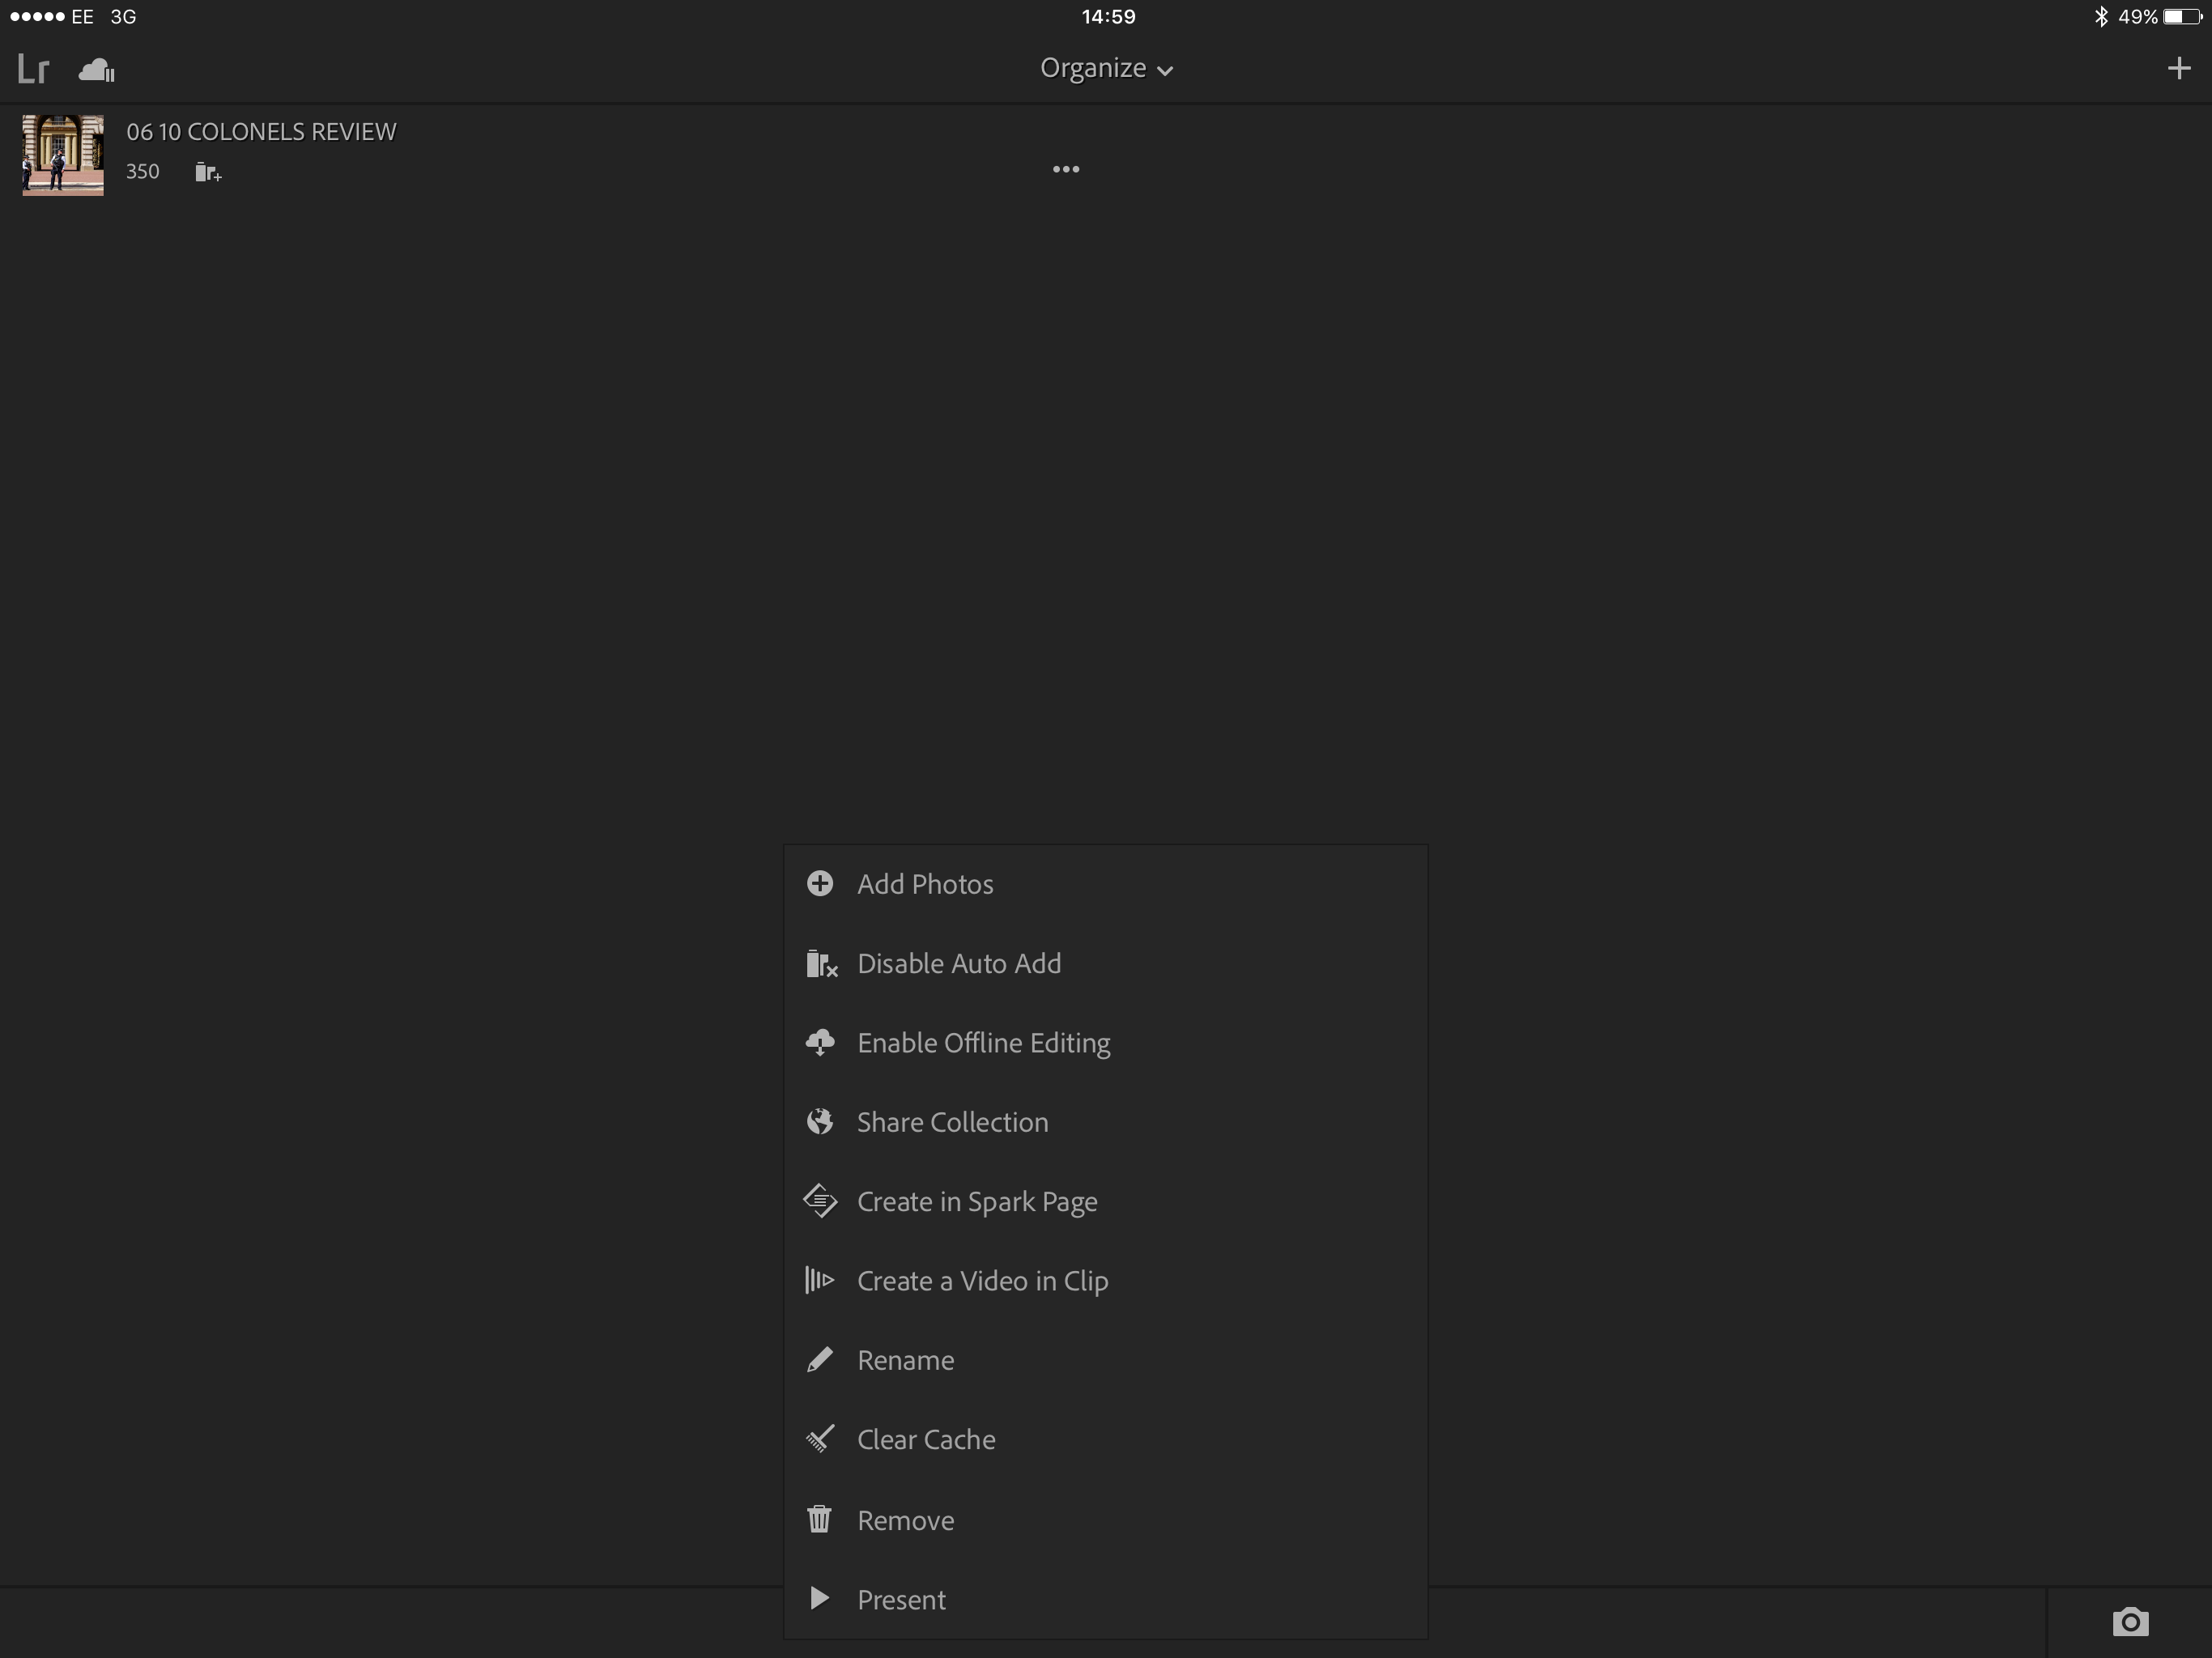
Auto Add: Use the … next to the collection name to enable Auto Add to the relevent collection.
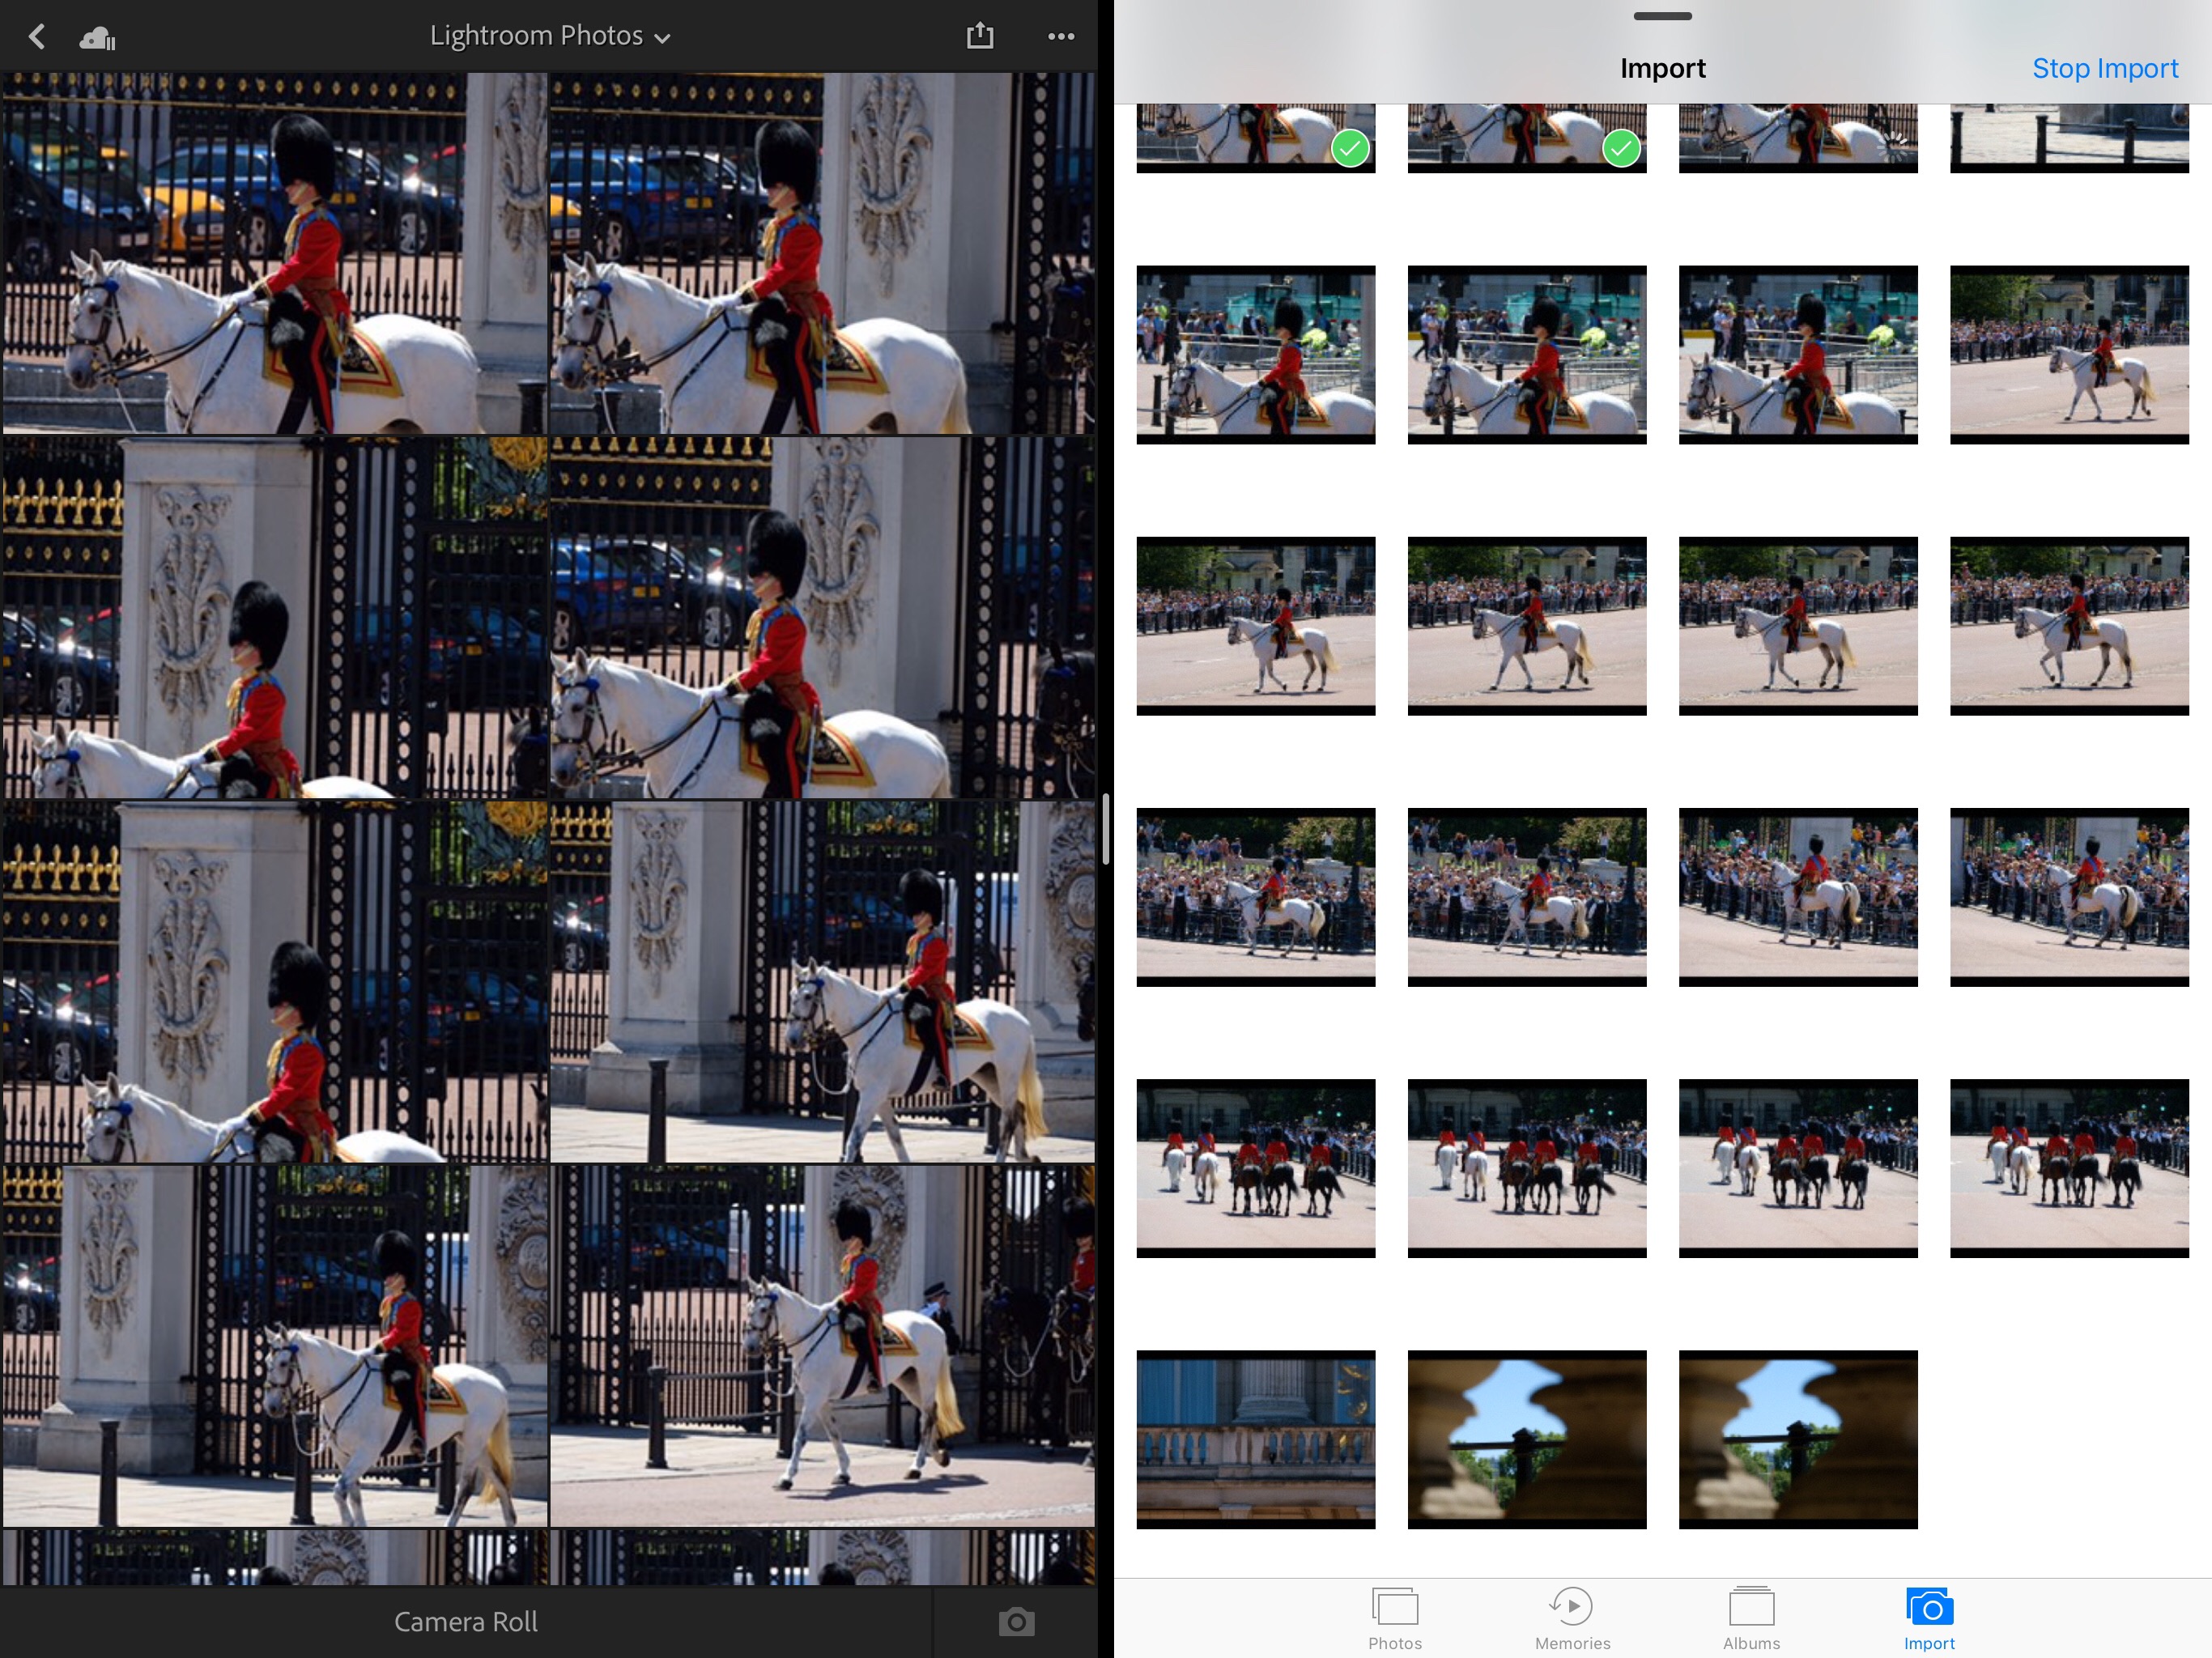
Switching to split view with the photos app running next to Lightroom as the images ingest from the card, they will be added too Lightroom at the same time (see you can multi-task on an iPad).
Speed Flagging: This enables images to be picked or rejected with an upward or downward swipe whilst in the editing screen.
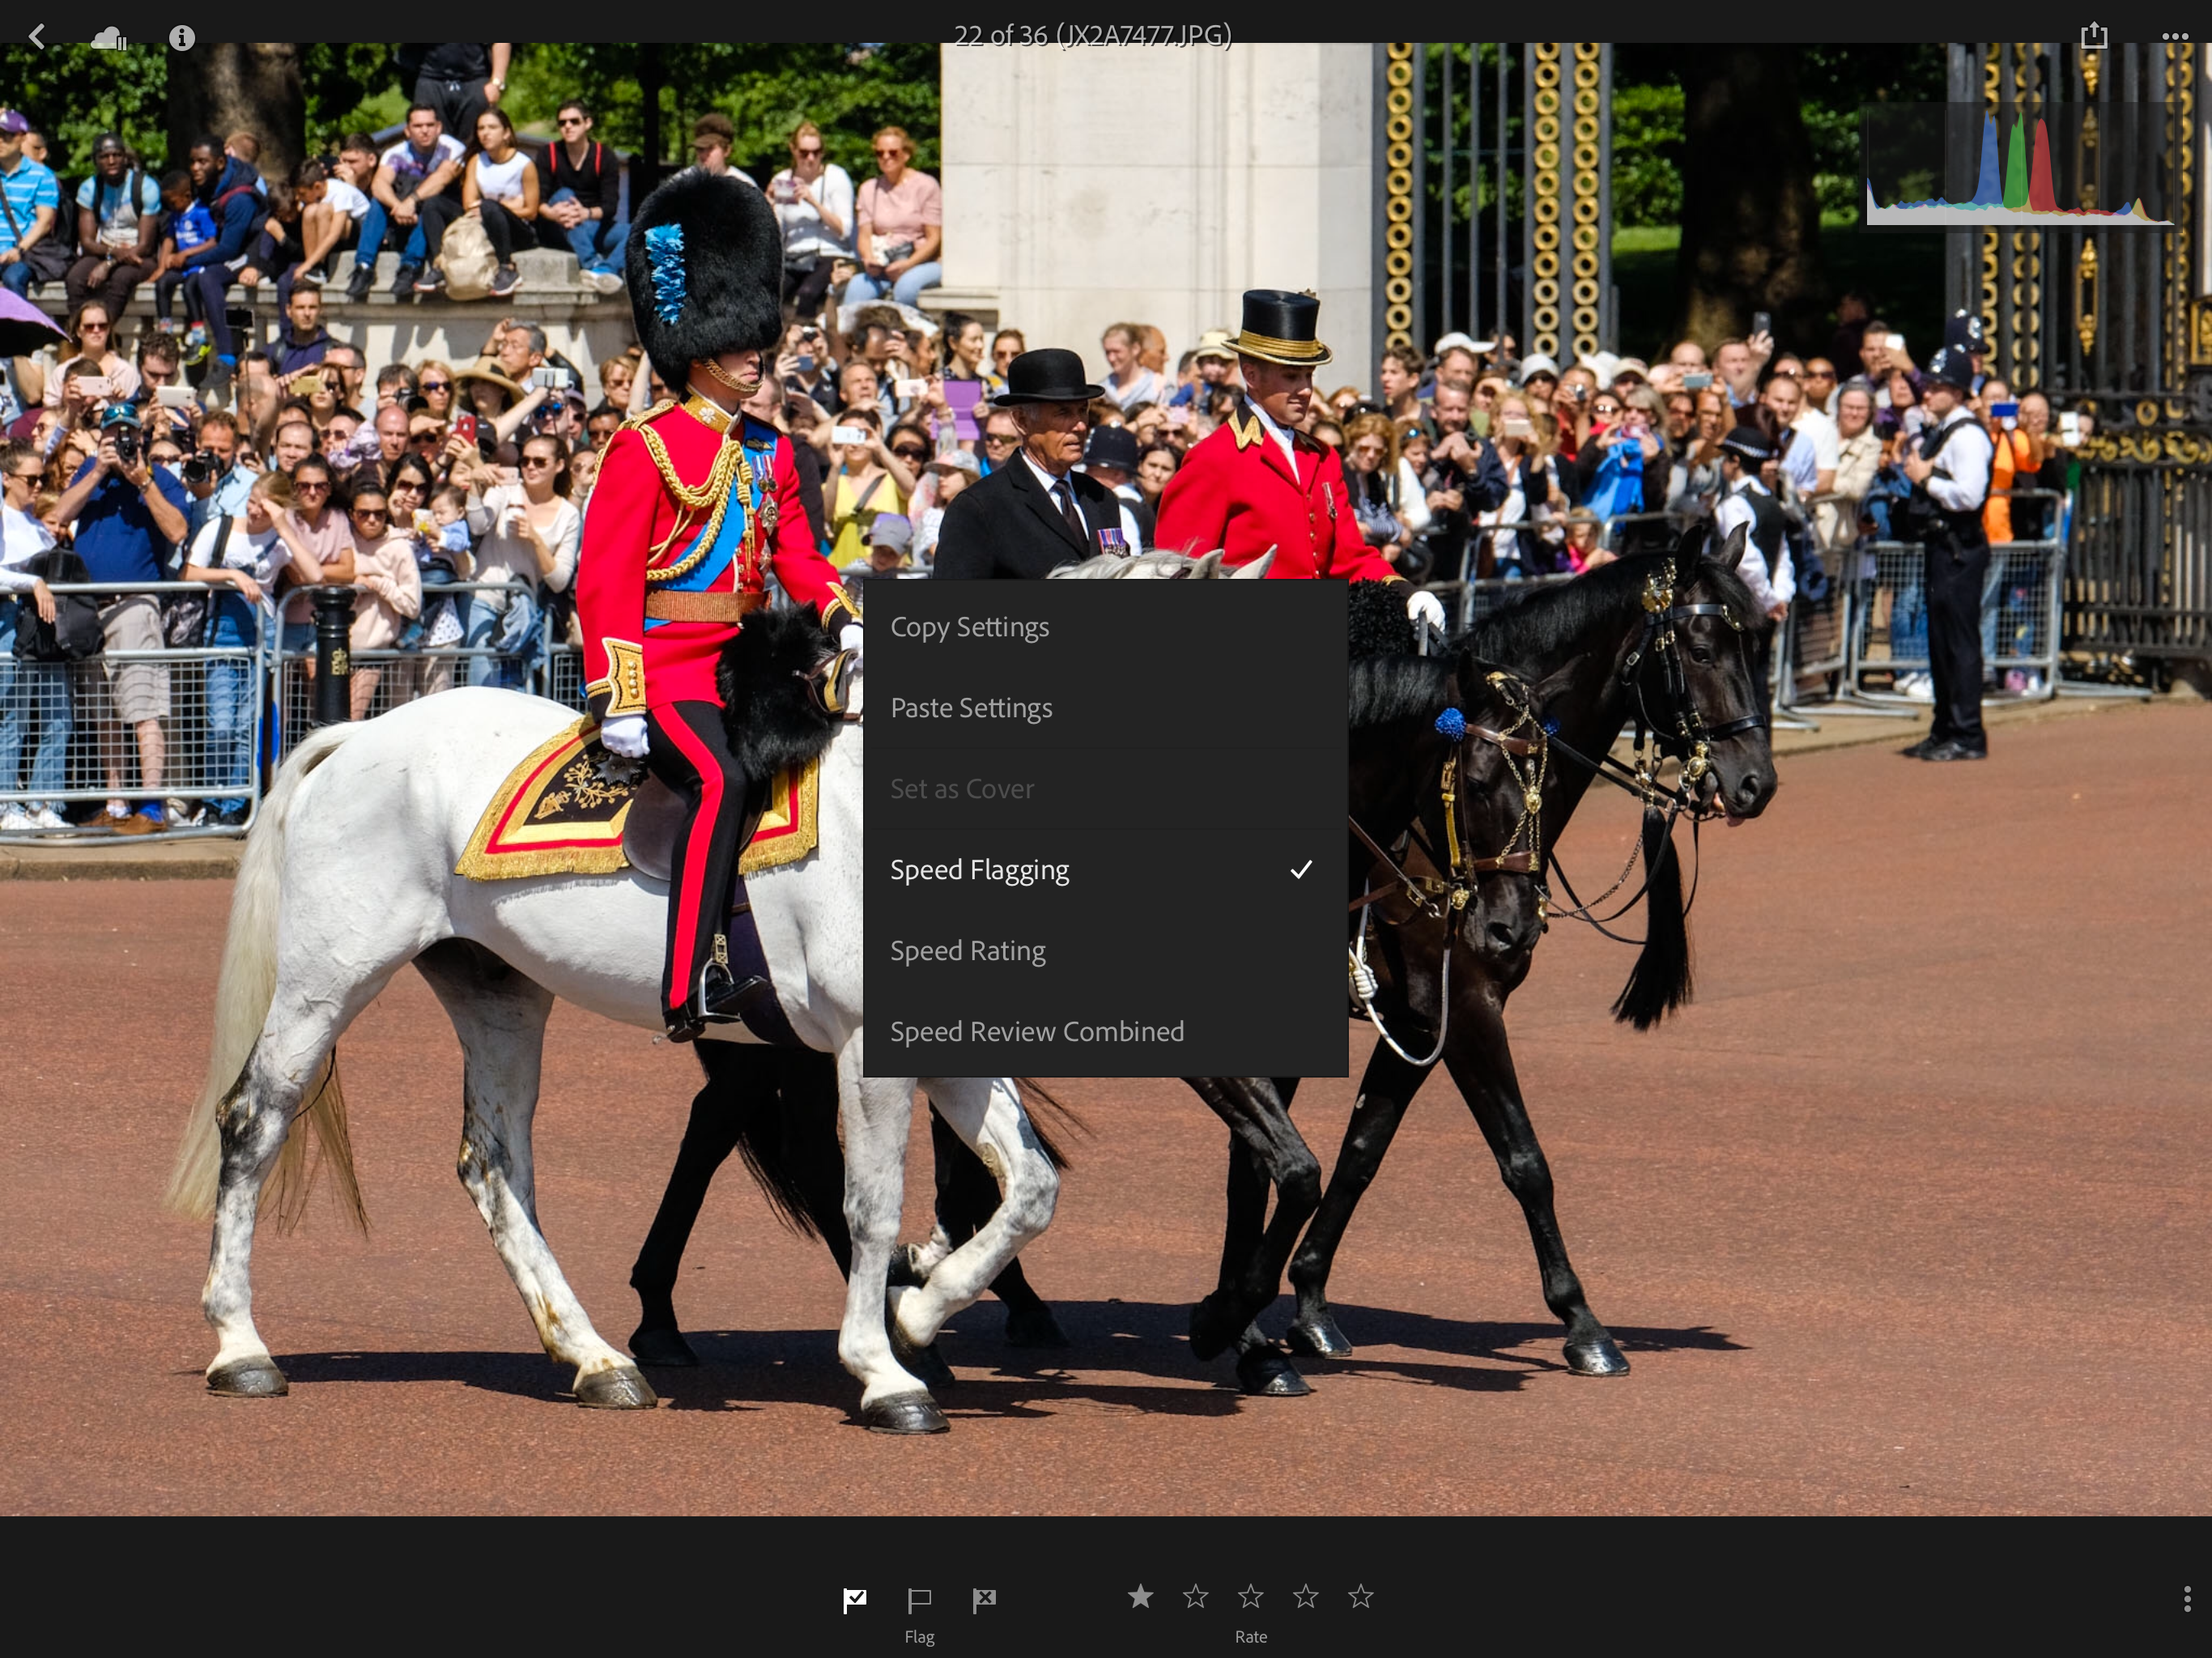
Once the images are ingested, the card is cleared and put back in the camera. I switch to single image view and enabled a filter on the collection to show only unflagged images. I then swipe down to reject, skipping those I am not sure about until i get to the first image I want. Before I swipe up to pick it, I complete the basic edits – crop, curves, levels etc. and then holding the finger (or pen) on the screen I use the pop up to copy the settings (all settings excluding crop). Only then do I swipe up. The process then continues, swiping down to reject and pasting the edits, (hold down again), cropping then swiping up to pick going through all of the images.
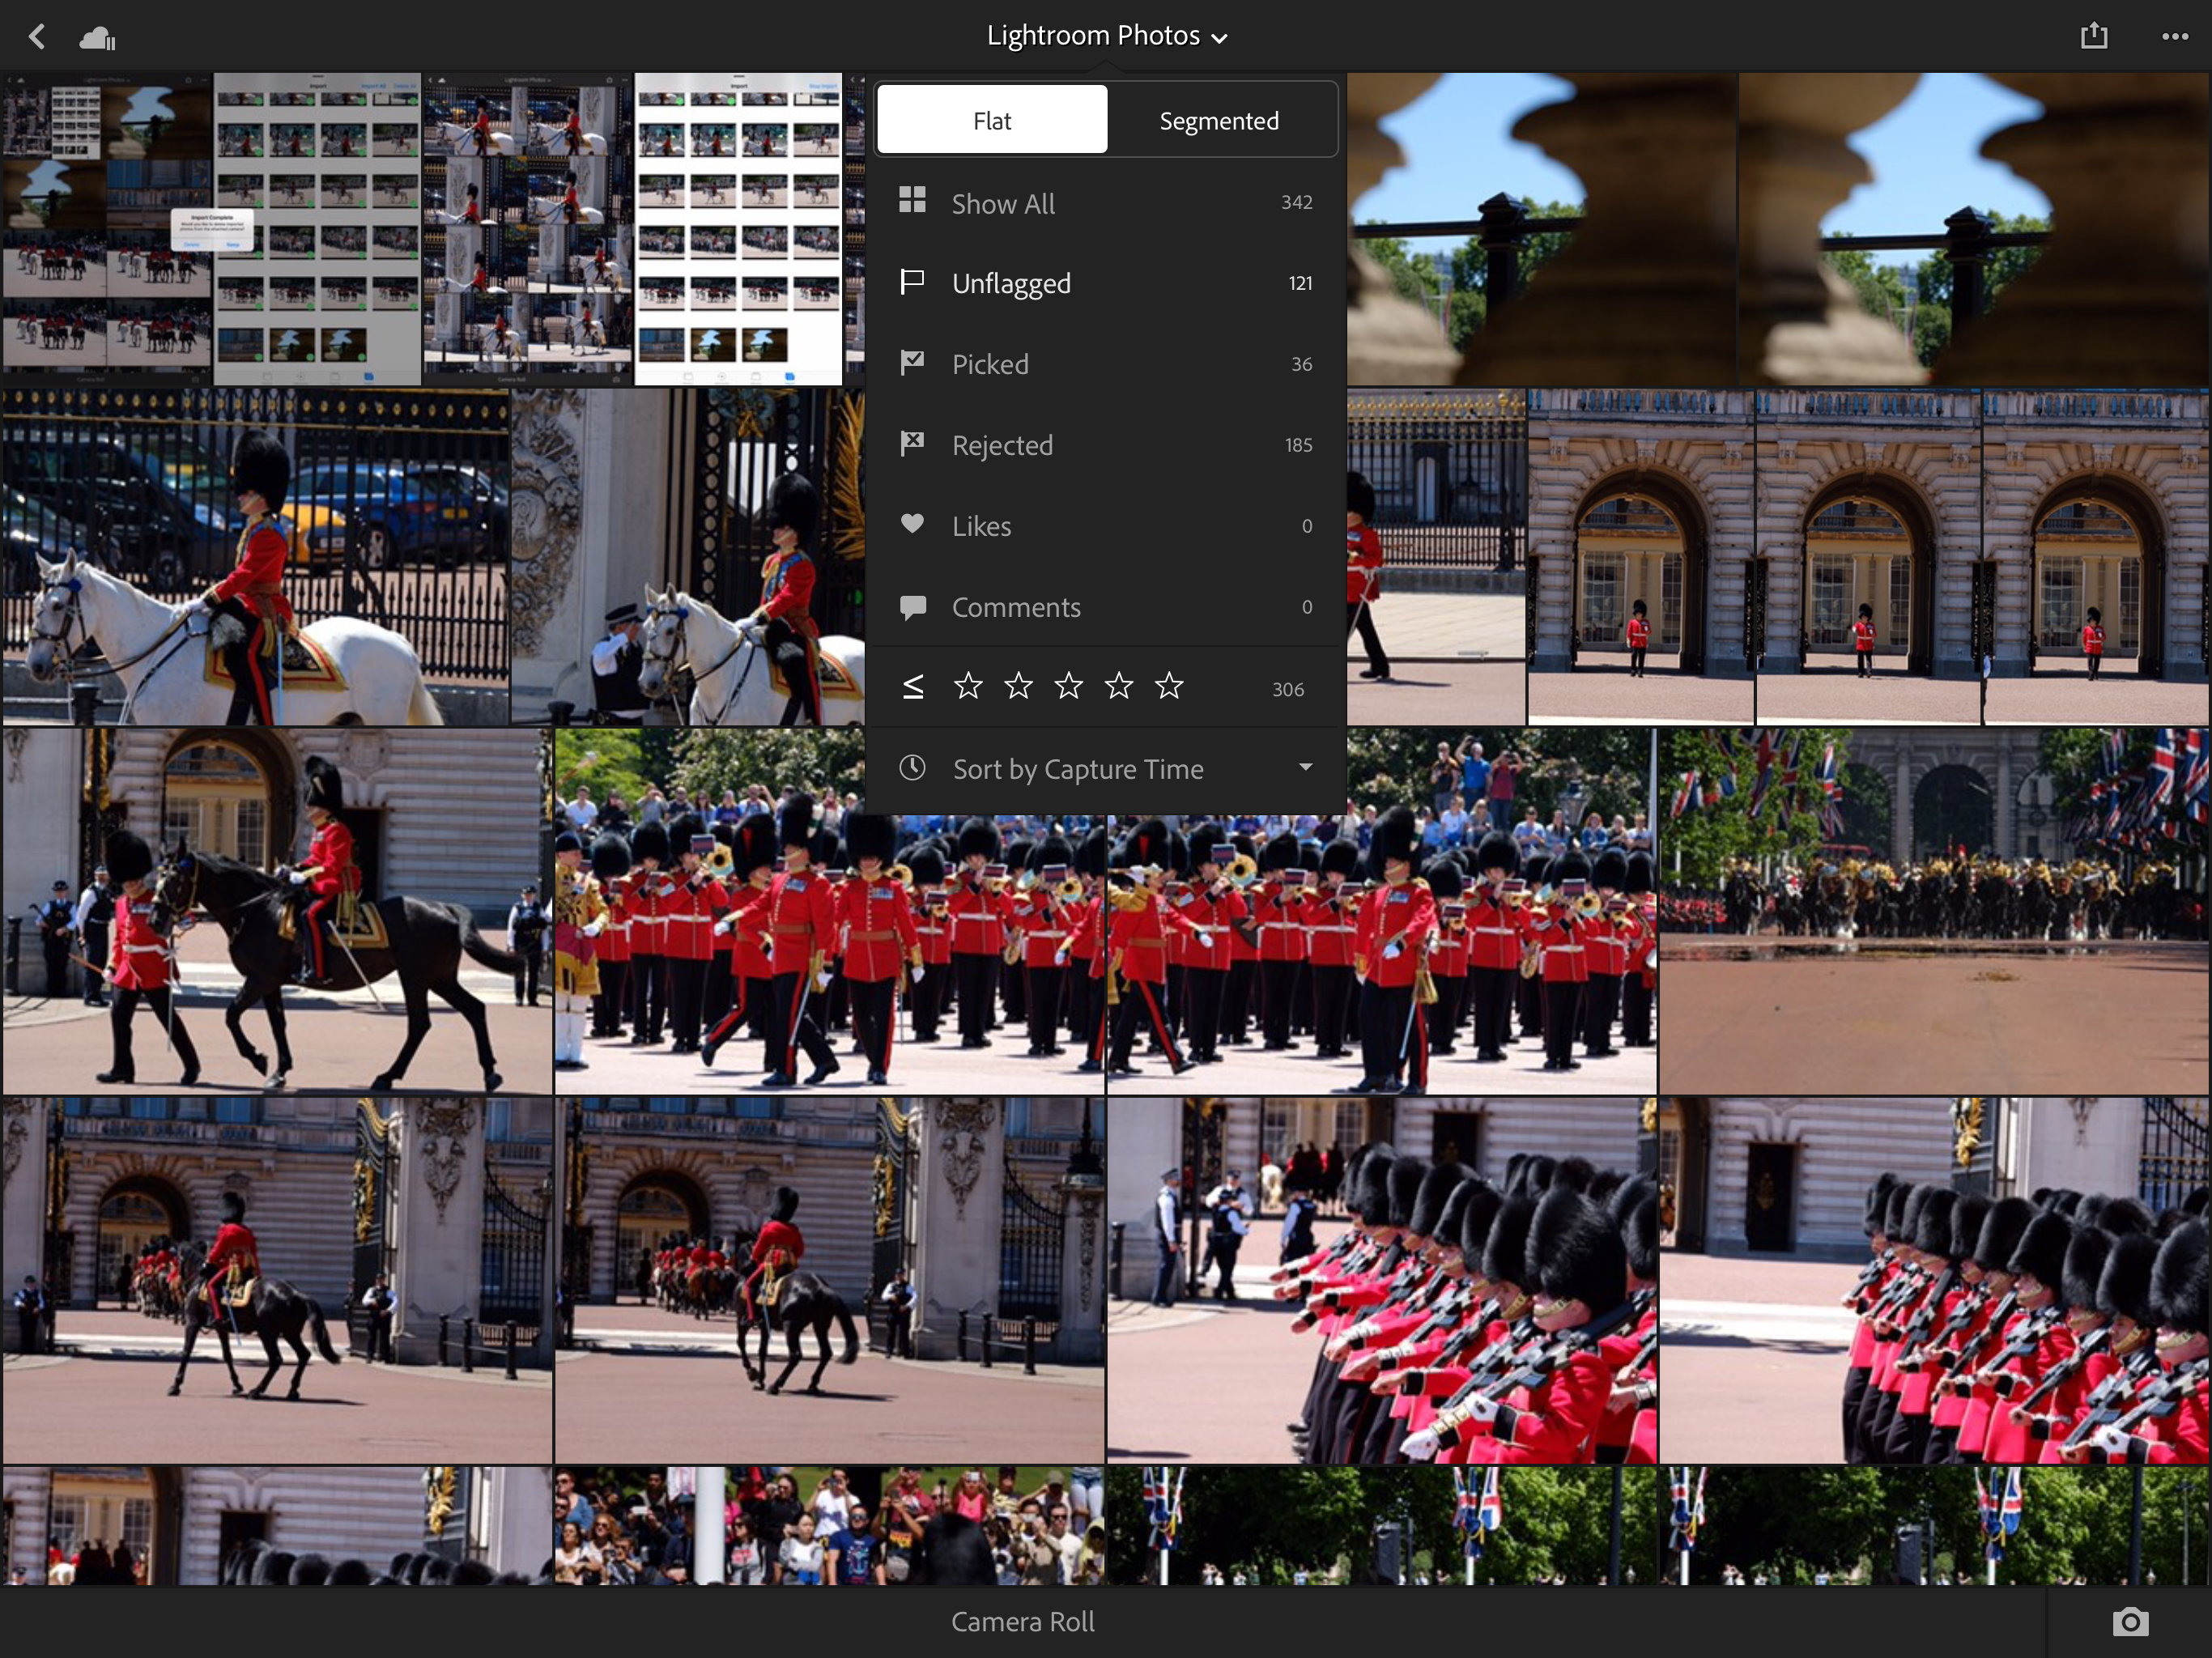
Once at the end I know I have all the selects and rejects. I switch to the “All Lightroom Photos” selection, set the filter to “Rejected” and delete all the images.
The next stage is surprising! I go to the camera roll and delete all the images just ingested (it’s ok! They are held within Lightroom now – its made copies in its database).

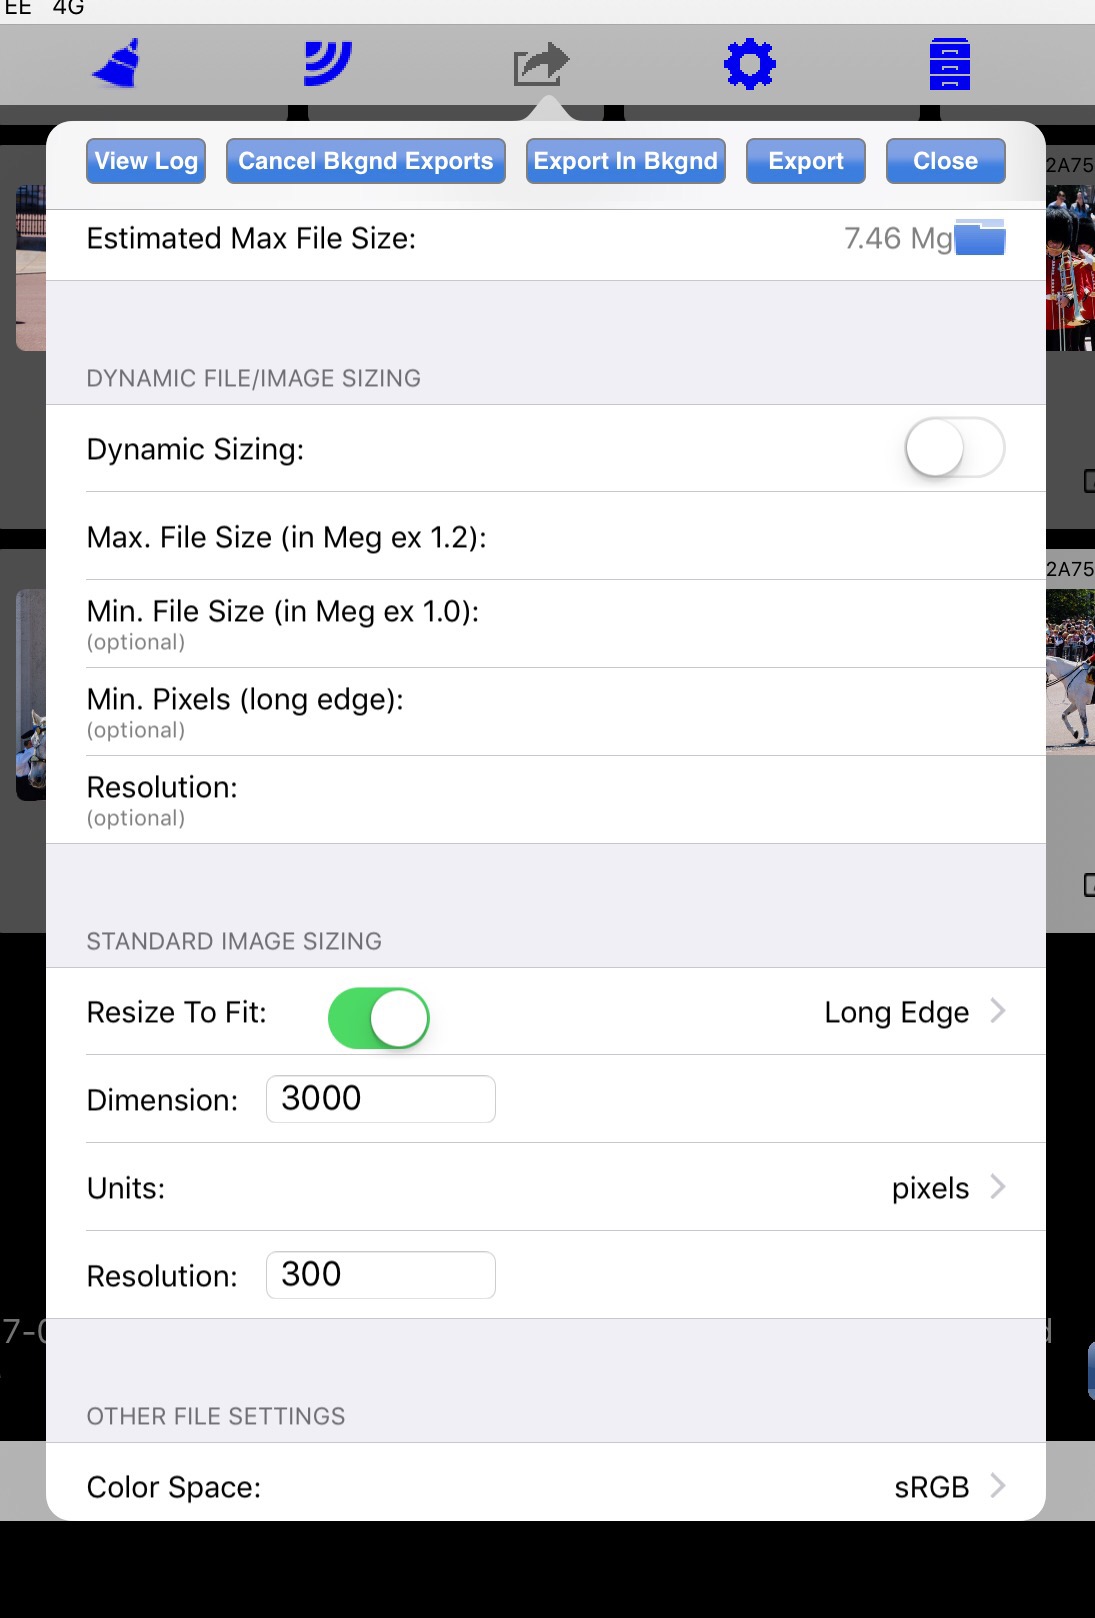
I now export the images from Lightroom to the camera roll (this is a slow process as there is a limit on exporting 15 at a time), selecting the maximum size option. This leaves just the edited selected images on the camera roll ready for captioning and sending.
PicturePro
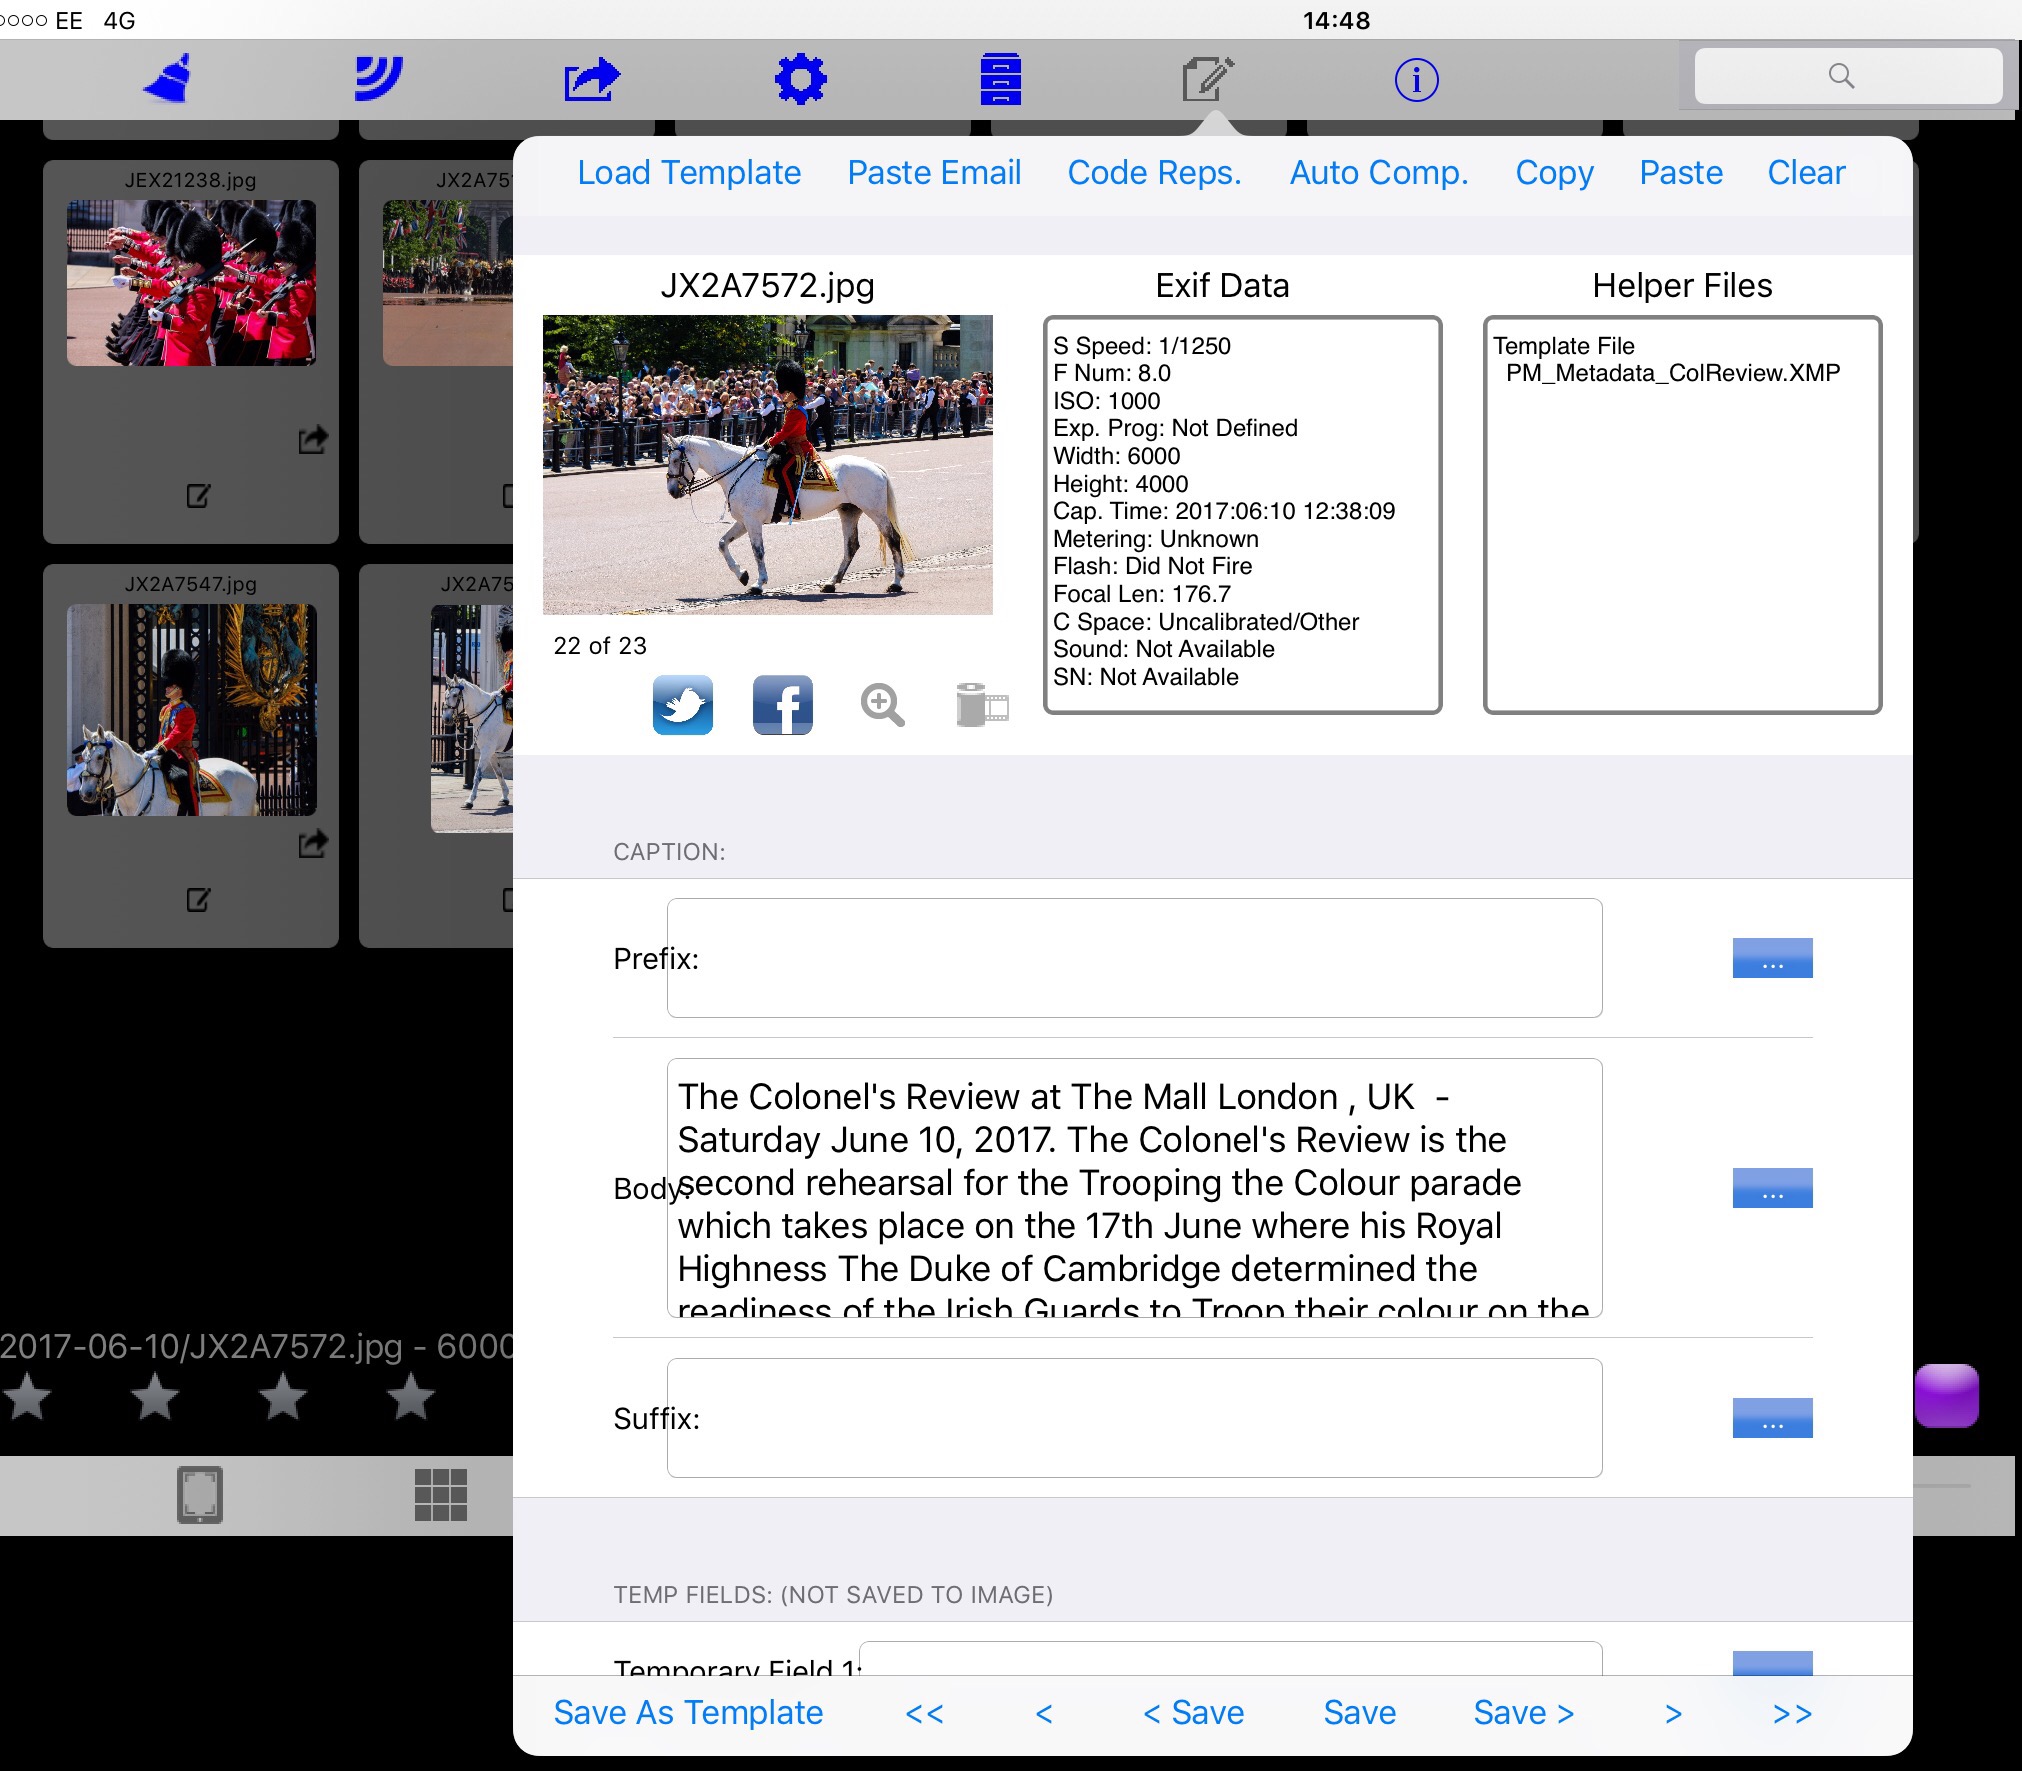
In PicturePro I make extensive use of base templates. Upon opening the correct image folder / date should be selected.
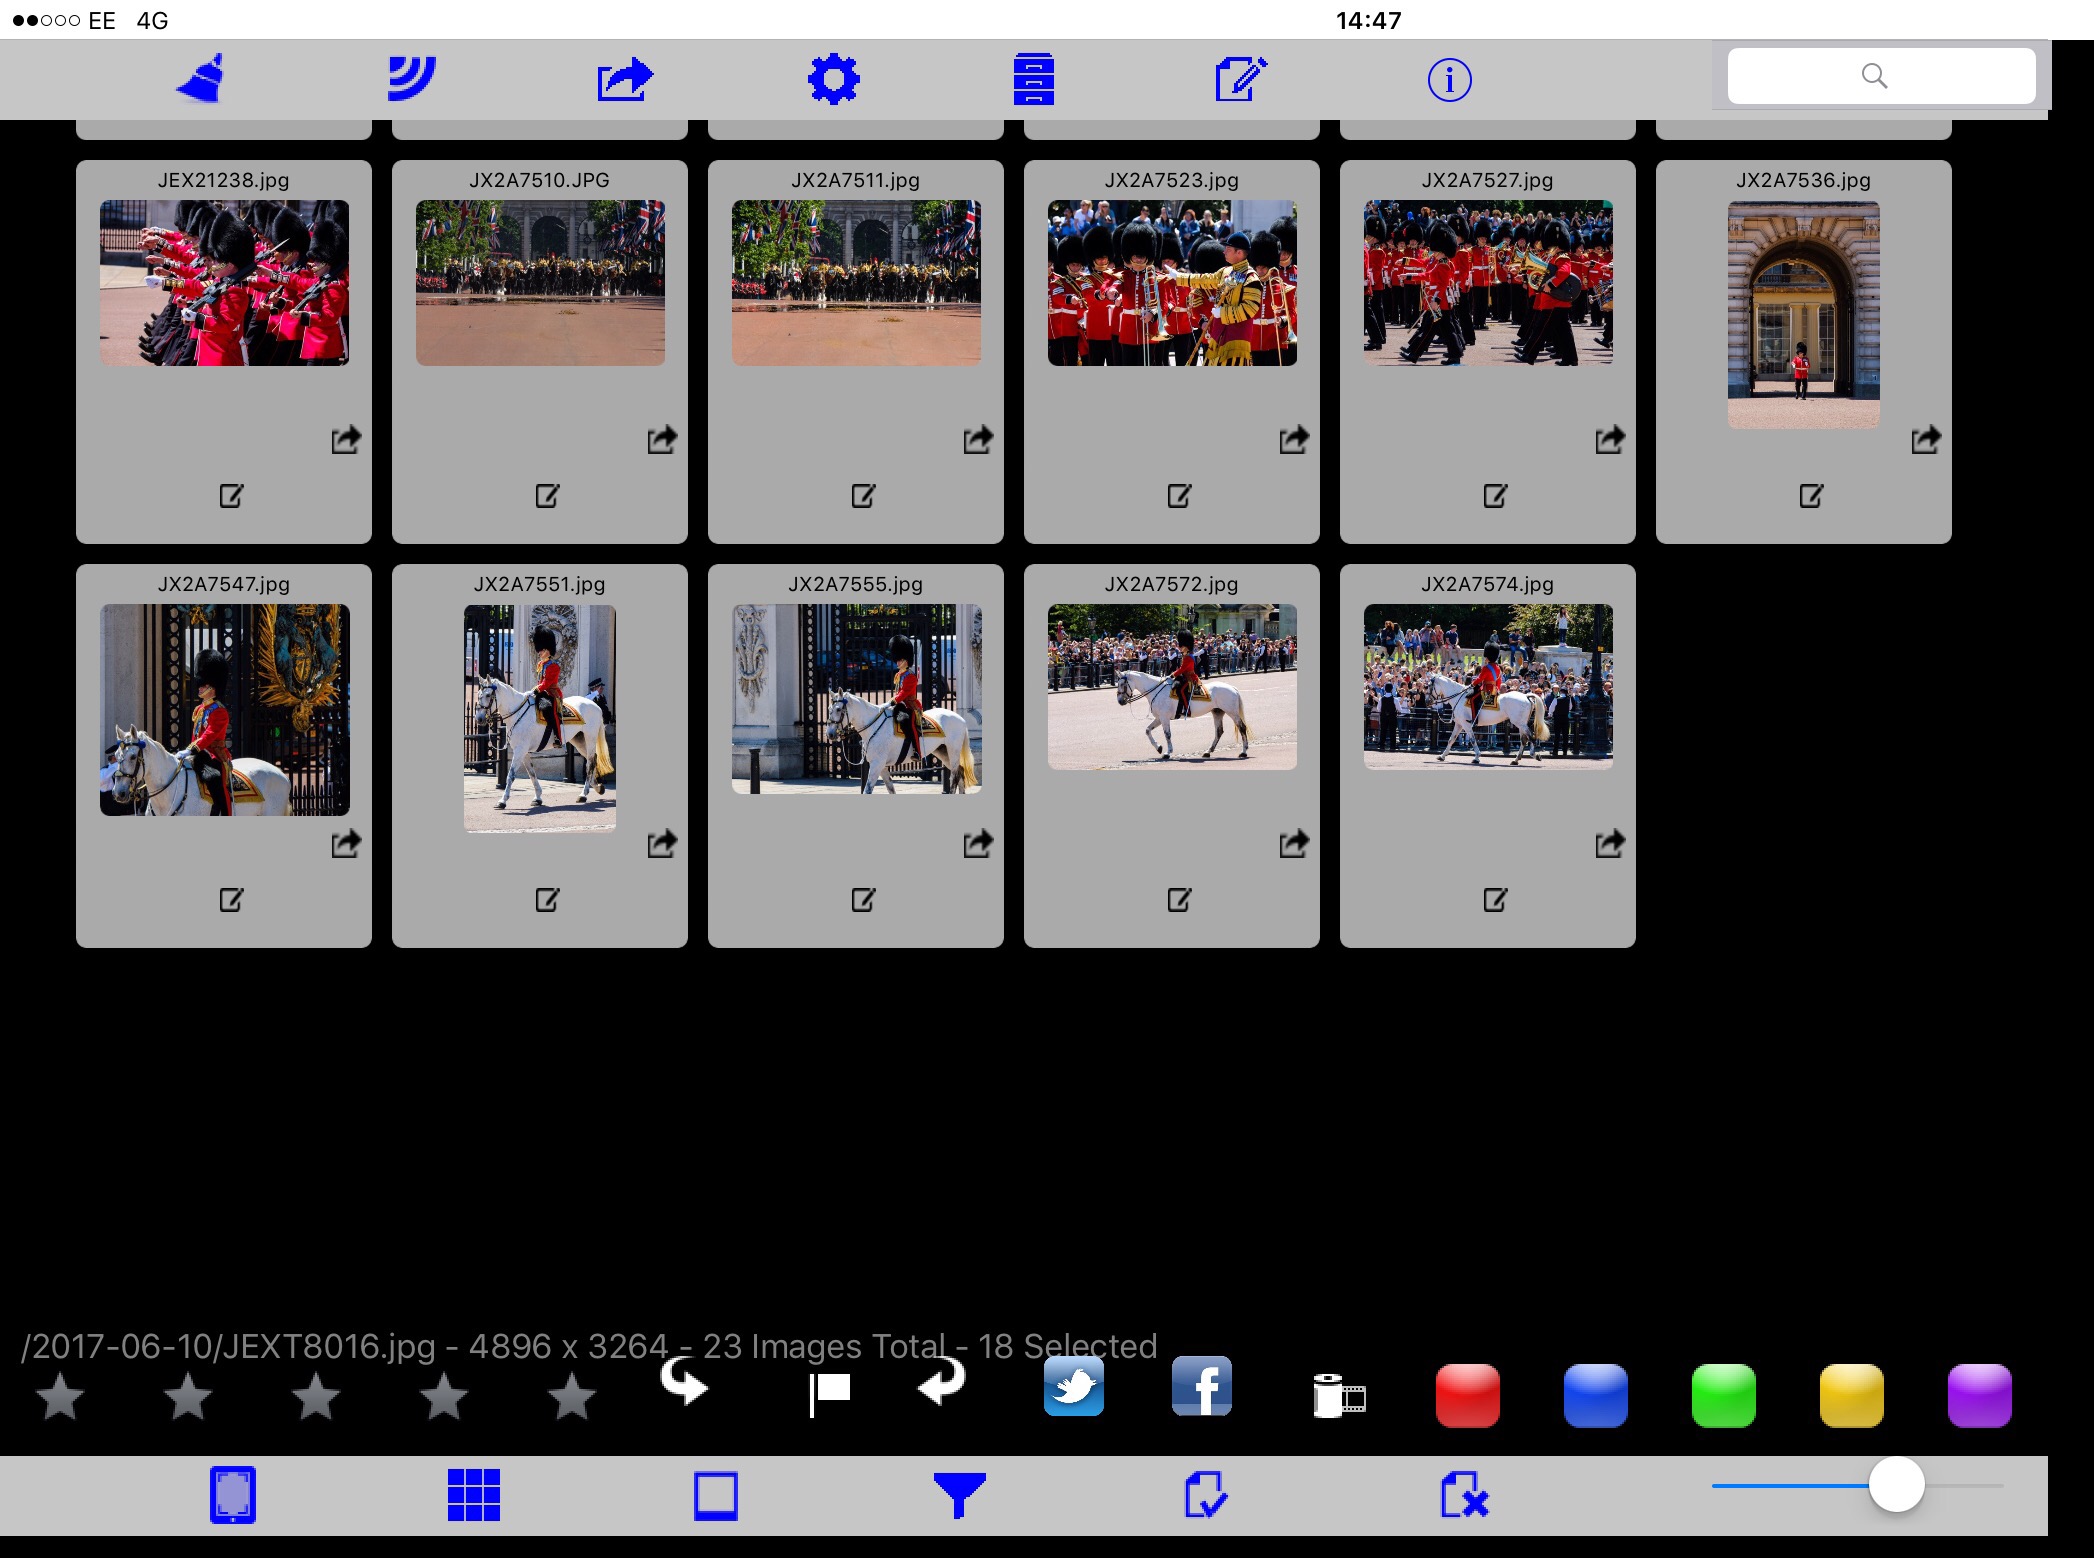
Load the metadata editor on the first image and load the relevant template and edit the data to suit. I then copy the data before using the save and next button, paste in the data from the last image, tweak and move on. Each image that is annotated has a small icon on its lower centre (in grid view).
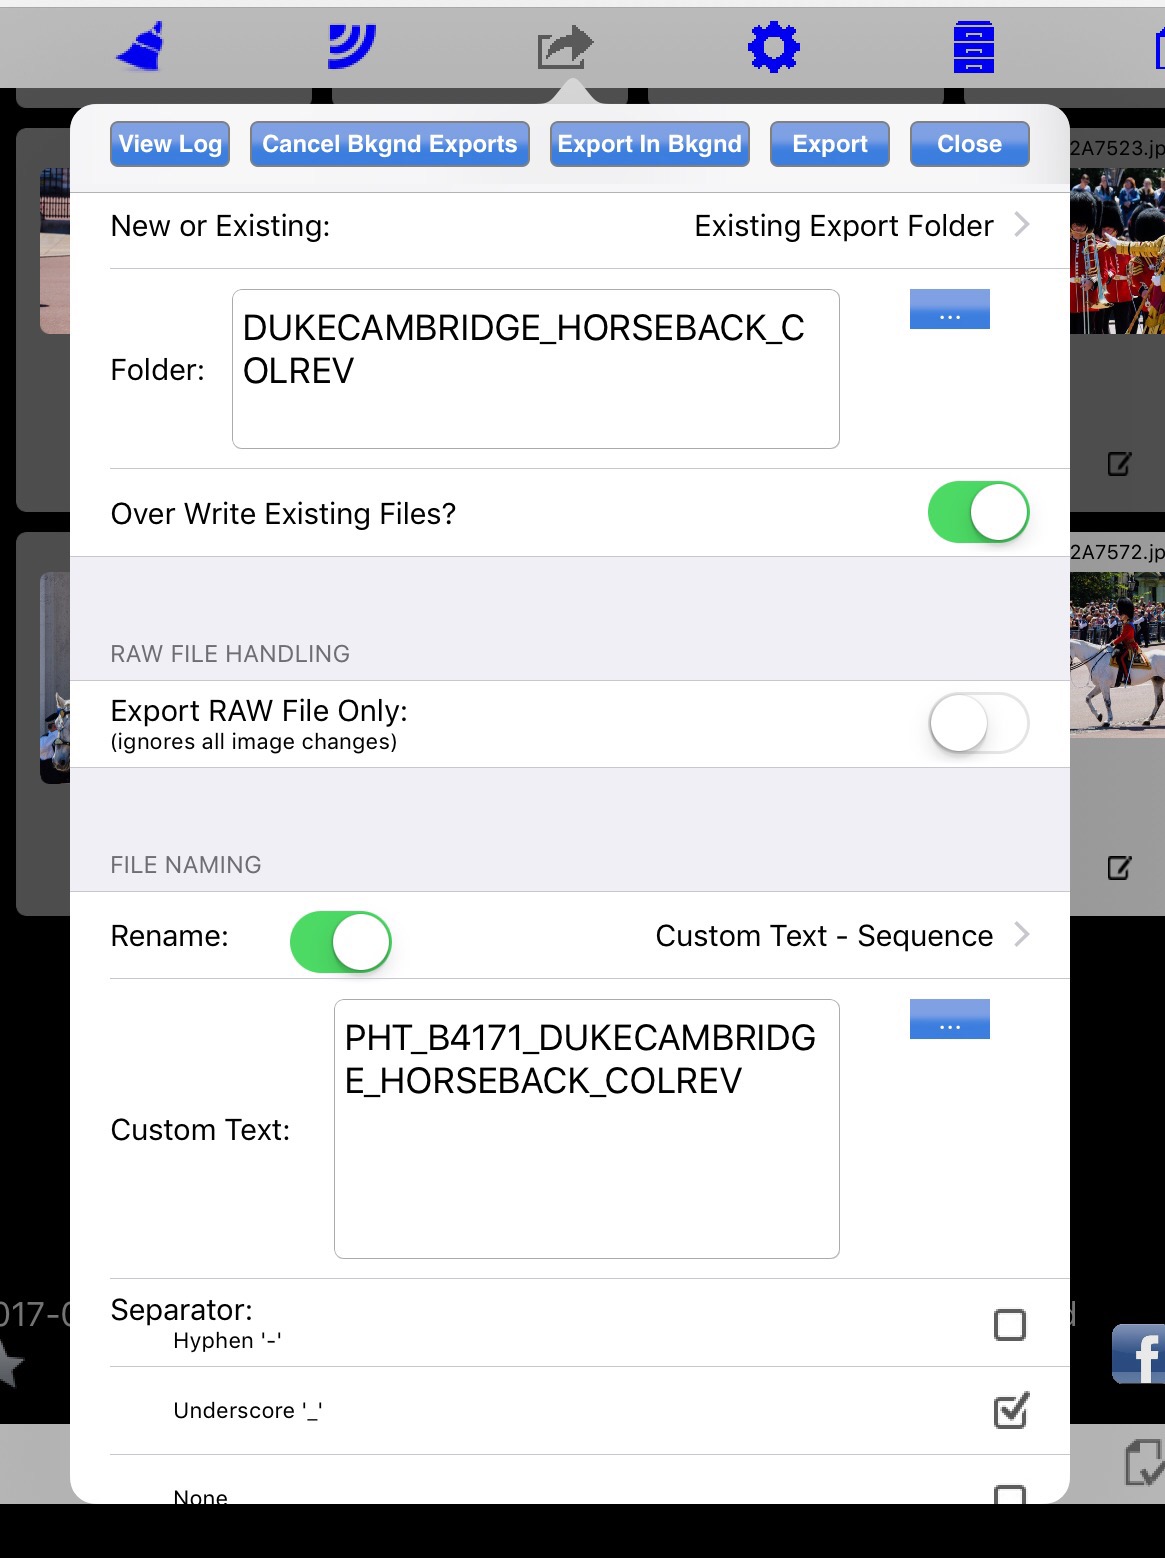
Once done I select the annotated images (hold to select a batch, double finger tap to add single images to the selection) and export using the FTP panel, resizing, renaming and saving the images in relevant folders as they are transmitted. Each image that is exported has a small icon on its lower right (in grid view).
Once Back at Base
PicturePro has stored all the captioned and edited images in folders which can be accessed via FTP. Lightroom will synchronise all the original images, with edits via Creative Cloud to the desktop machine. (But no metadata on them). I add the PicturePro images to my Lightroom to sit alongside the originals which I leave uncaptioned because I know I can find them via the captioned exported versions.
Conclusion
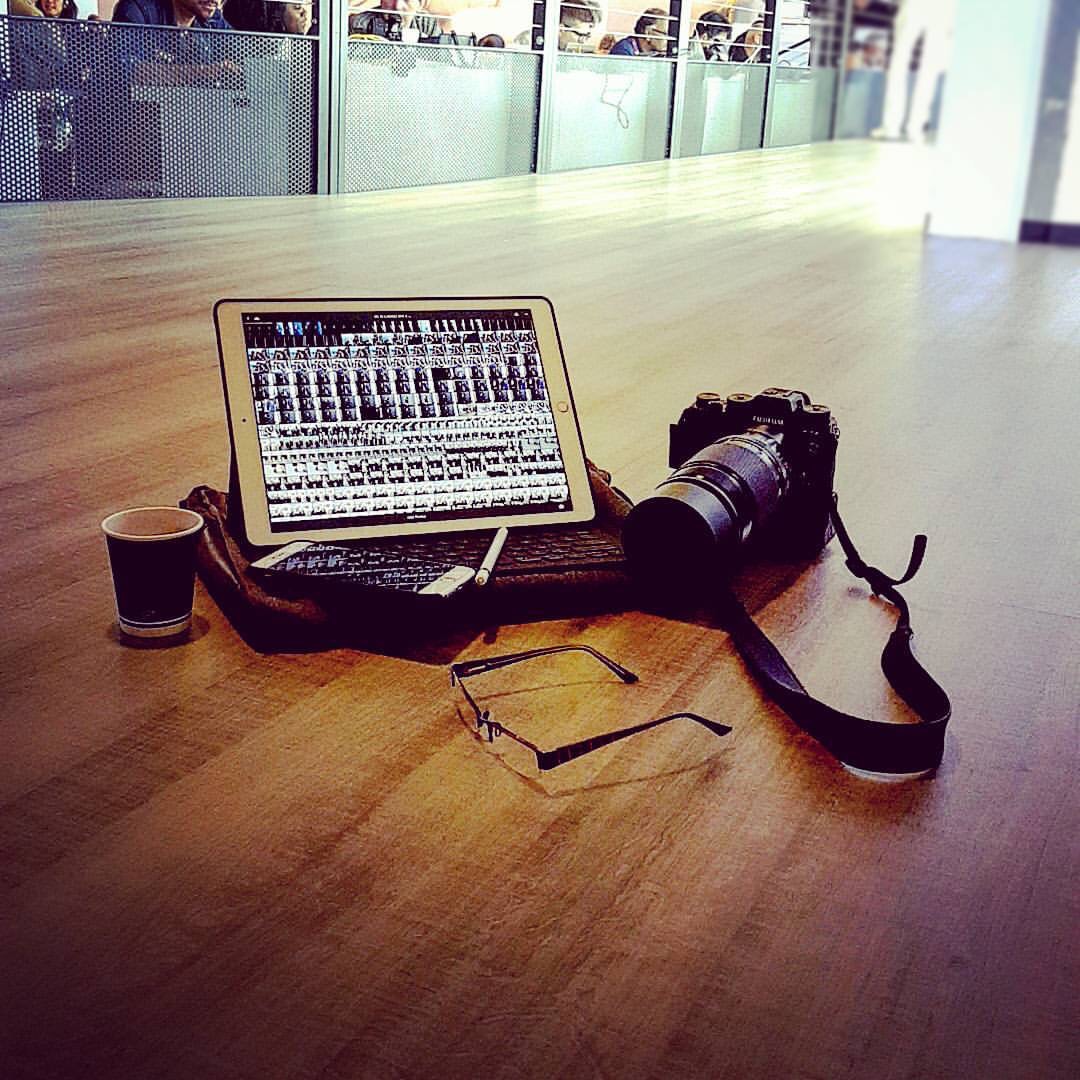
There are obviously advantages and disadvantages to this workflow. I find the iPad an extremely nice tactile thing to use, using the Pencil and Keyboard I can work on my lap, on the floor, seat, basically anywhere, much easier than if I were balancing a Laptop. Using the pencil on the image itself as a tablet is a joy with the keyboard folded back out of the way until needed for captioning. Batch editing is minimal though, I cant apply the same edit to 100’s of images in a single manoeuvre but I dont see this as a huge issue as I normally have to look at each to crop it as I want so pasting the settings as I crop does not really slow me down. Its always pointed out that iPads have no colour management. Correct, the screen cannot be calibrated but its a mobile platform, it’s not used in a nice controlled environment. Every day I am out shooting and editing in different light with differing ambient levels and colours, so is this really the issue many flag it to be?
Comparing the captioning between PicturePro and Photomechanic the main loss again is batch processing. In PicturePro I do have to check and paste the metadata into every single image but this does have the advantage of ensuring I think about every caption. At the time of writing PicturePro doses have one or two issues. It will crash every now and then but with this workflow I do not lose any work – its more just having to restart the software (which is almost instantaneous). PicturePro also has image editing which I have used in the past for small batches when I need to be very fast but a bug affecting only the iPad Pro means I am waiting on a software update before I can do this again.
This post has been a long time coming, the workflow has been tweaked and will continue to be but it was working this way that I sent almost 3000 images over 10 days from Cannes so I think it works. let me know your thoughts, comments , questions.
Julie

Excellent article Julie – very informative. Might dip my toe into iPad Pro workflow myself….
Thanks for the post!
LikeLike
Really interesting article Julie, thanks for taking the time to write it. It comes at just the right time for me as I am currently in the process of looking at investing in an iPad Pro for this exact same use. I need a small powerful mobile editor that I can confidently use on location and your recommendations and comments for the apps you use will prove extremely useful. I currently use Photogene4 on my iPhone but its extremely limited in what it can do. Also moving to iPad Pro and being able to use a bigger screen will help my failing eyesight.
Thanks Julie, really helpful information. 🙂
LikeLike