The last two posts on mobile workflow have raised a few questions from readers on how I deal with metadata. I thought I had dealt with it in previous posts (admittedly a long while back) but re-reading them it seems I had not covered everything.
Therefore this is just a quick overview. I am actually looking at running a course or two on this mobile workflow in the UK this year in conjunction with theBPPA. If you are interested, please let me know and I will send out booking information if and when…
A quick apology for the image I have used in this post – it was all I had on the iPad at the point I outlined this post.
From our last post we are at a point where there is a collection of images in ShutterSnitch either with or without metadata in the title field.
The first issue is, where do we start with our data? Can we start with Photomechanic? The answer to this is yes we can. I export the XMP from PM into Dropbox and then on the iPAD, export the file into ShutterSnitch.
The i Icon on the top toolbar switches ShutterSnitch to the Metadata Editor.
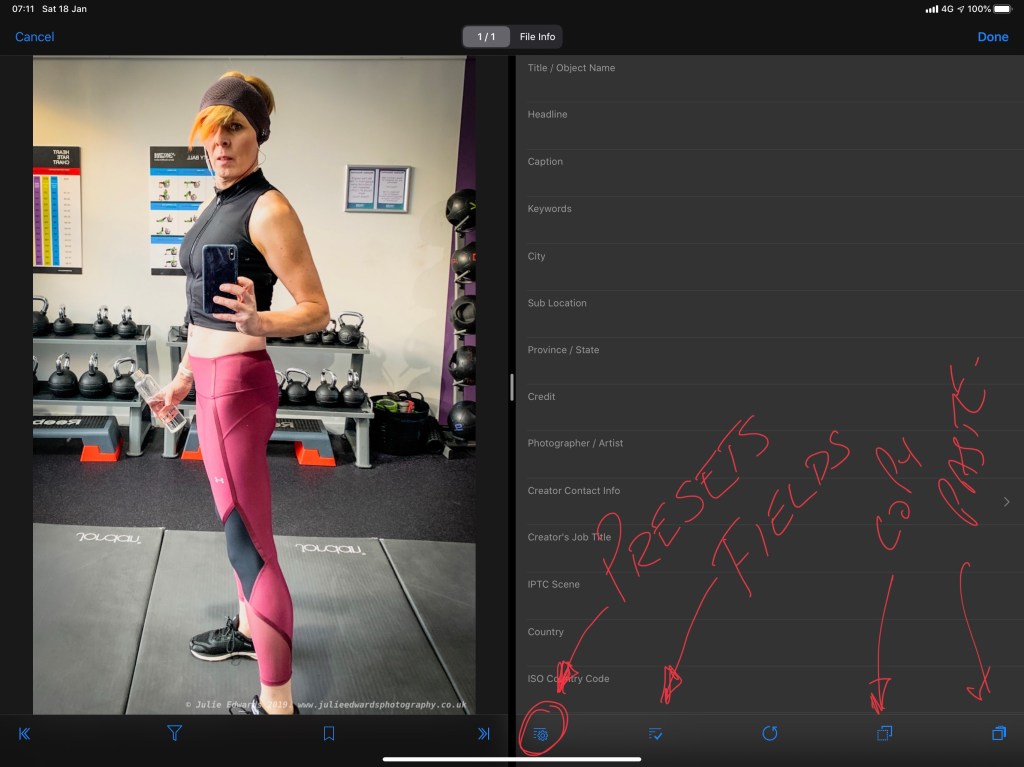
As shown in the above images there are a number of options along the lower screen. The left-most tool is the Preset Editor

The choices are just to select a preset or use the Edit button to edit the presets available (the usual iOS left swipe to delete) or click to edit. Hold down to duplicate an existing preset.

The blue circle tick to the right indicates wether the field is applied in the preset, so if using the title field from Lightroom this would be unticked next to the Title/Object Name. Notice the %%titleObject%% – this is a variable, much the same as the Photomechanic variables although they are named differently.

If using Photomechanic , the variables will need replacing. There are far fewer in ShutterSnitch. They may be accessed from the tool hi-lighted above. Below is a typical preset driven by the Title/Object Name field with the date automatically added also.
Note: It does not seem possible to add variables into the keywords at the moment.

If driving the Title / Object Name from Lightroom, the above preset could be applied to all images when selected and a quick check as you flick through will reveal all of the fields set.

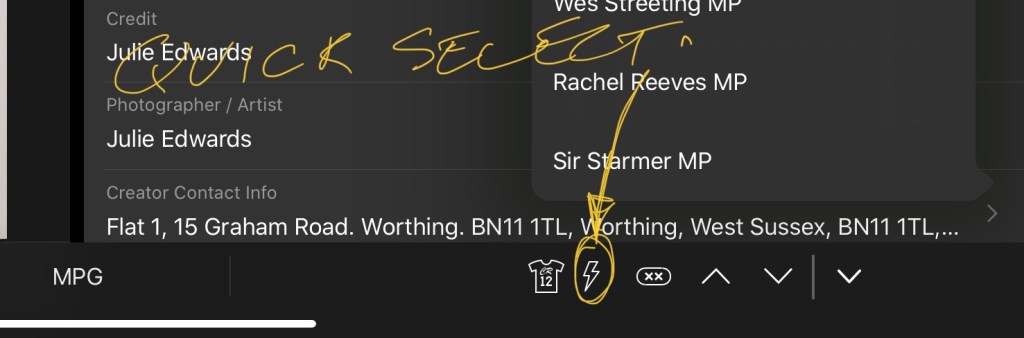
Once the preset is created, other tools are available in the editor. Quick select strings (which are field sensitive, so create them in the Title field if that is where you plan to insert them) may be created and selected.
This enables a list to be built, maybe copying and pasting from a website before the event
The final options are Shortcodes.

Press and hold to edit the available lists. Creating new Sets and editing are fairly straightforward.
In use Shortcodes are slightly less usable than in Photomechanic as after entering the code (however many letters you use), the Icon (tee-shirt) needs a quick click for the software to expand the code to it’s full length. Shortcodes do, however save on spelling errors and incorrectly titled subjects.
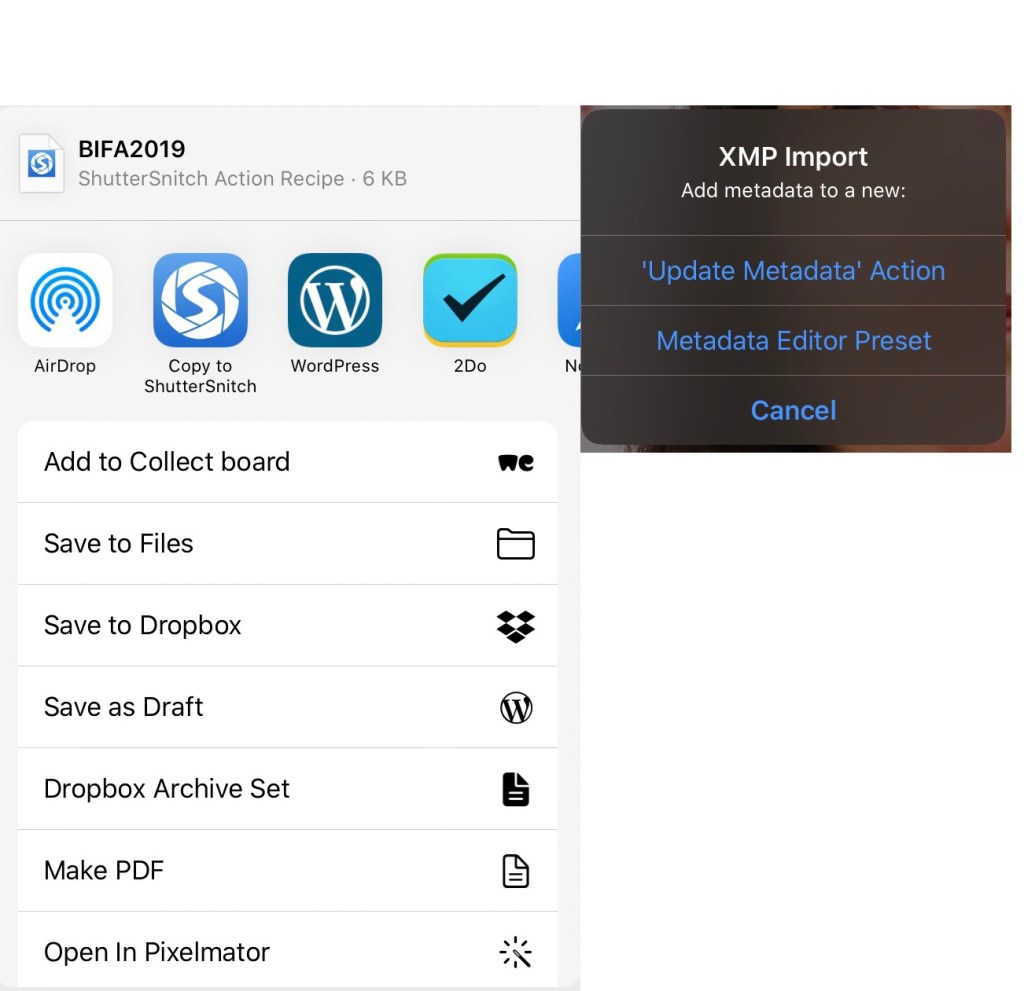
All that is left after adding the metadata is to send using FTP or other Actions which are well covered towards the end of this post.
There are many more options are settings but hopefully this will get you moving. As always, please ask any questions in the comments to that others can also learn.
