This post is a much shorter post than the previous one, just looking at the options for getting the edited and titled images from part 2 out of Lightroom mobile and on to somewhere else.

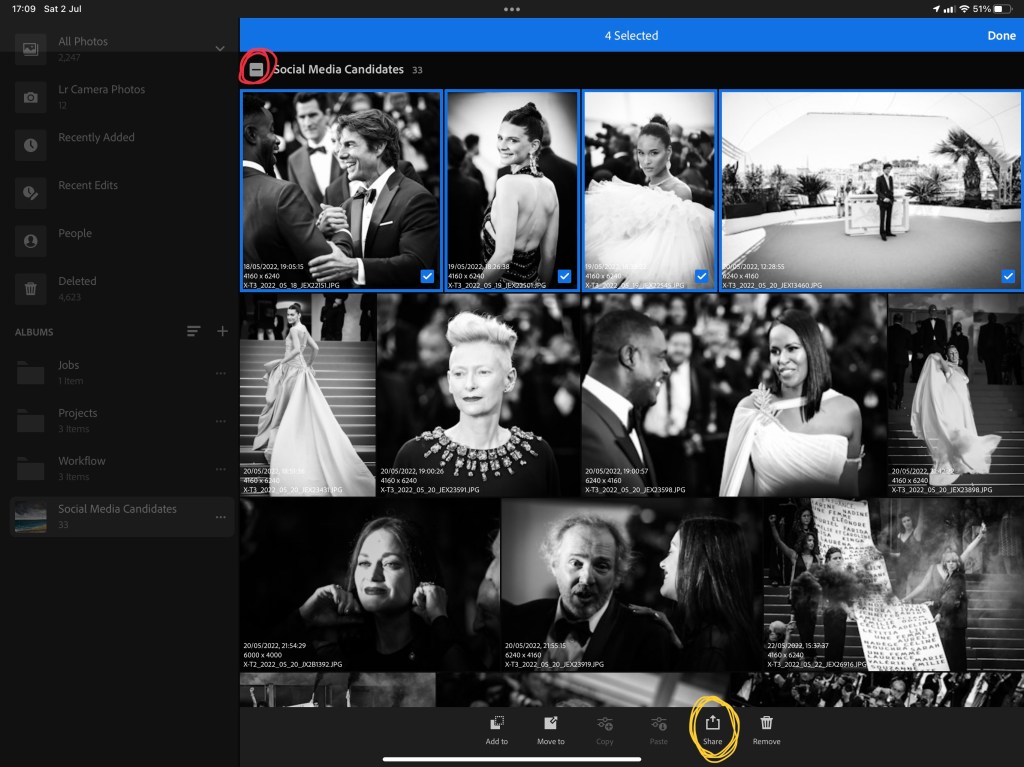
Although commonly known as the share icon in iPad parlance this icon in the top right of the screen essentially provides the export functions of Lightroom (but with far more limited options).
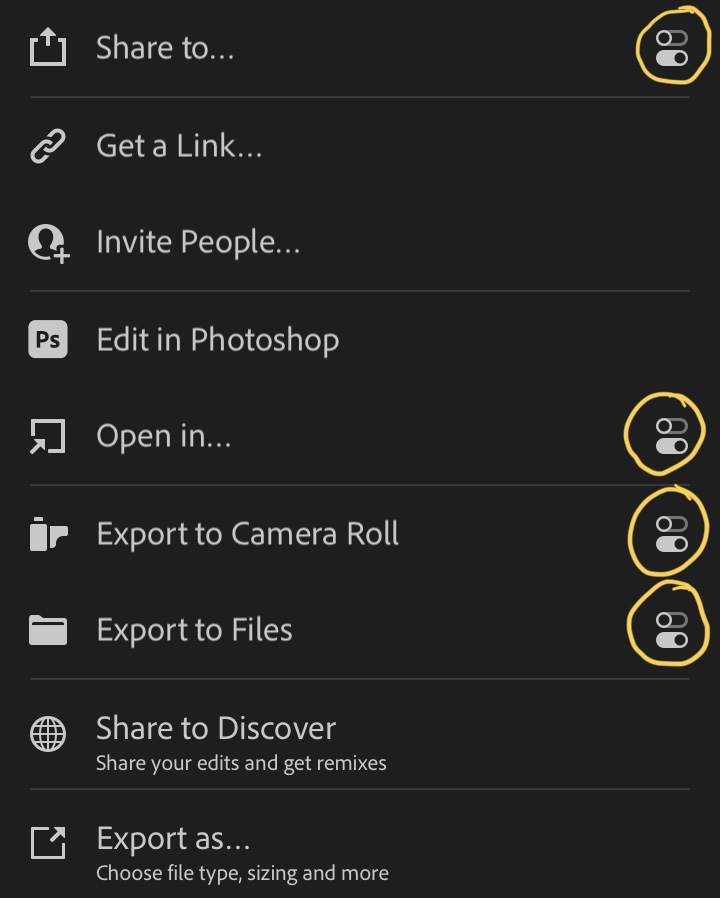
Each of the 4 destinations I have hi-lighted above have pre-set settings that are independent from one another.

First lets look at my Export to Camera Roll settings, you can see i write a jpg with the size limited to 1500px on the longest edge. If you know Lightroom well you will know you rarely need to export images at 100% quality. The Camera Roll exports also include my text watermark (nothing fancy, settings shown below).

The thing about the watermark is that unlike the desktop version of the application, this watermark is shared across all of the export options in all of the cloud based applications. It can be disabled in some exports and enabled in others but when it is enabled, it will always point to the same single watermark.
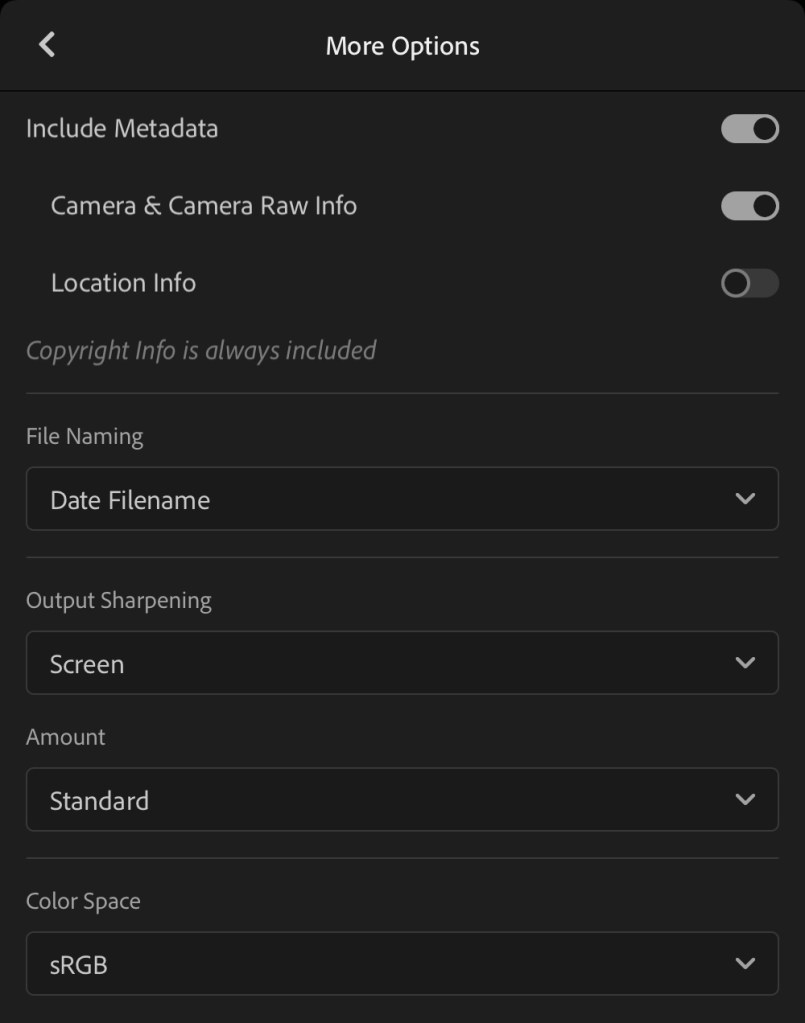
The final set of options are as follows , providing the final set of expected controls for an exported image. In all exports I expect we would all include all metadata and as far as File Naming is concerned, I felt a combination of the date along with the original file name (that from the camera) is the safest option for a unique name.
My Exports to Camera Roll are only really used for my posts to social media. When sending images out to press or clients, the Share To option is the one is use with settings that corresponds to this use.

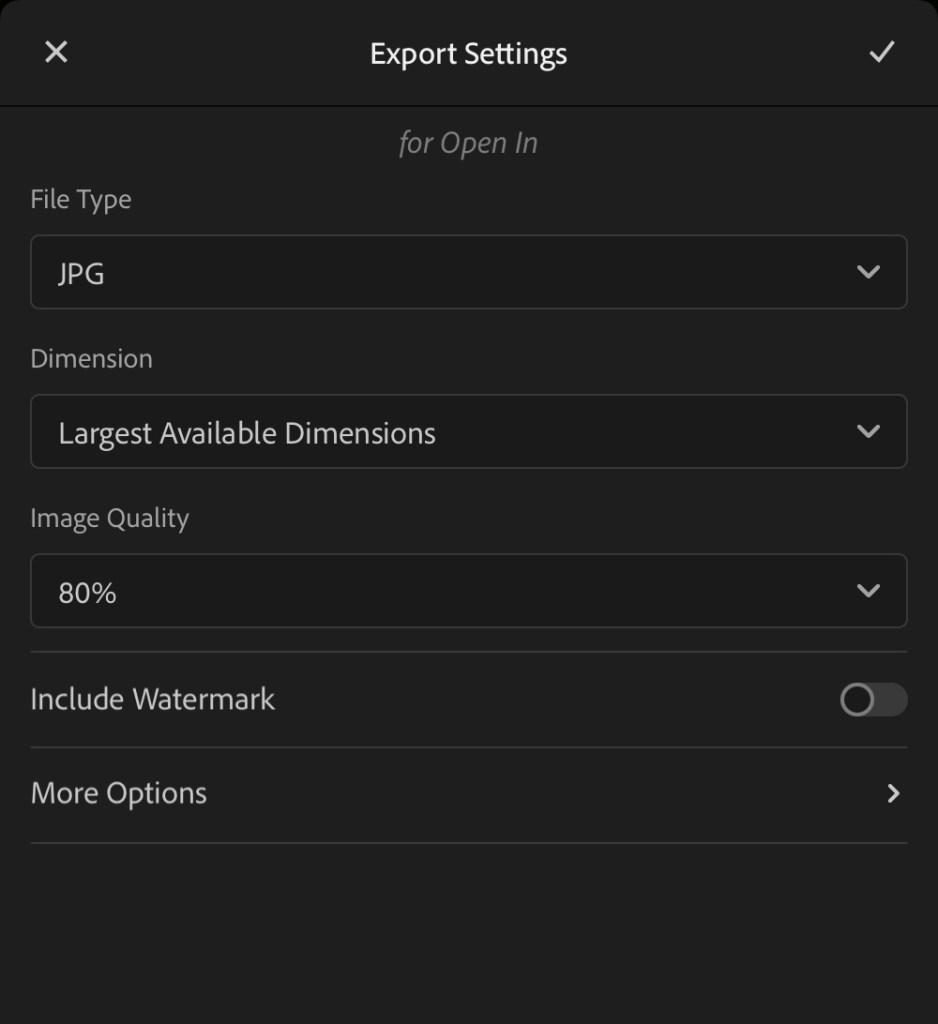
Obviously larger files and no watermark. (My Export to Files settings mimic these options just in case I which to use iCloud, Dropbox or my ZoHo WorkDrive to deliver images to a client, all of which are accessible from the iPad Files app).
Finally if editing in another application, the full image size and quality should be used.
Having set the options up, the best way to export a number of images in one go is to be in Grid View (as with the desktop app, use the G shortcut) and long select (press and hold) a single image. The app will switch to multi-select mode. Tap each image to send or, select all of the images by using the icon in the upper left (circled in red). Note in this mode, the Share (Export) icon has moved to the bottoms of the screen.
Selecting the Share To option following the export, the following options appear (on my iPad, your apps and settings may differ)

If your required option for the image is not listed (or is too far down the order), scroll to the bottom of the list and Edit Actions to control the standard list that always appears.
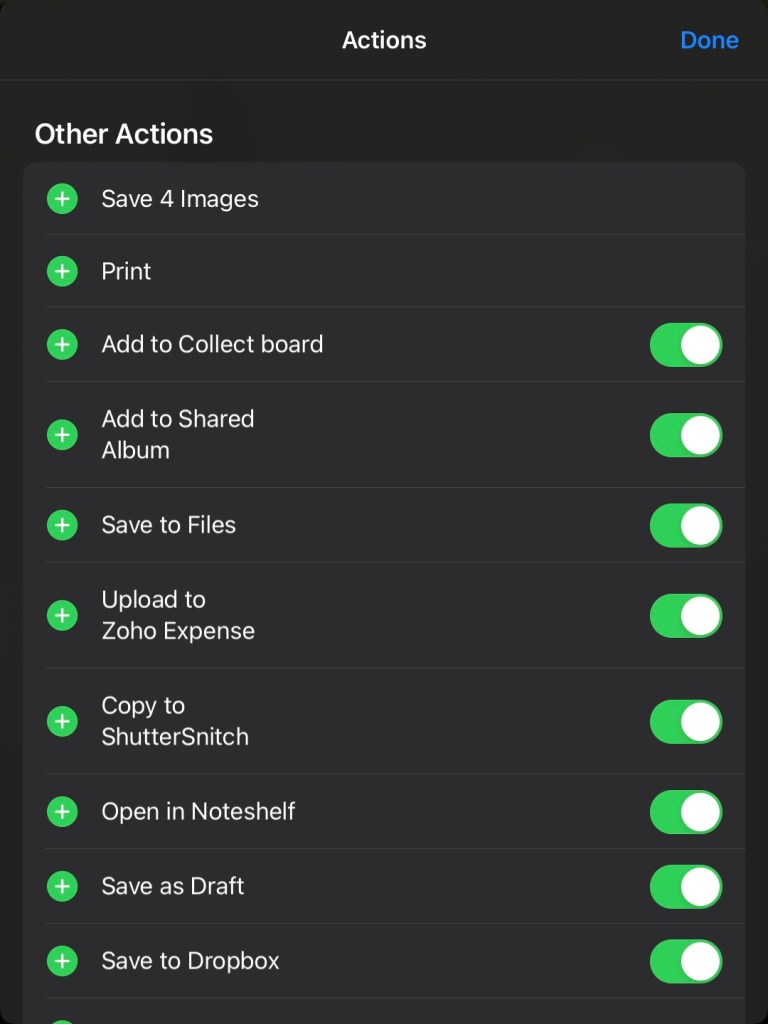
The key here for the next step is the Copy to ShutterSnitch as this is the action that sends a group of images as opposed to a single image to the tool I use to complete the caption/metadata and send on to the client/papers.
That however is the subject of the next post or two..
I hope you found this post on exporting images from Lightroom useful. please let me know your comments, thoughts or questions.
Until next time…

Hi Julie,
Really interesting post as I am fascinated by how many different options there are to work these days and I enjoy seeing how different people use the technology.
I would be interested to know if you have ever used Filterstorm Neue, and if you have any thoughts on it. I use it, it’s not perfect but it has got me out of a hole a few times.
I have not been an Adobe user for several years and never missed it, but I’m always interested in returning back to it if it’s improved on previous versions.
I’m a CaptureOne Pro user on my desktop and I’m interested in their new iPad version but not made the jump yet.
As always, great info. I luck forward to your next instalment, cheers Paul
LikeLike
Hi Paul – thank you for the comment. I Used Neue a few times after it was recommended to me but I just could not get on with it – I (think) the issue was that the captioning seemed so long winded and flakey (for me – i might be wrong)
LikeLike
Yes, totally agree. I personally create pre-written templates whenever possible and copy and paste them in but it can be very awkward if working on a job where I can’t do that.
I’m hoping for an IOS version of PhotoMechanic to come along one day, not holding my breath though.
Great info as always, look after yourself,
Paul
LikeLiked by 1 person
Hi Julie,
Thank you for the ipad update. I can see how a tablet work flow is the way forward, but I currently work in reverse to your process…caption first, then edit.
If only Camera Bits would release an IOS version of photomechanic
LikeLike
I used to do the same. Still do on the laptop in the office as the captioning is part of the Photomechanic Ingest Process (for me). However sometimes you just have to take a step back and think of other ways of working. My process was I wanted to move to the iPad so from there I looked at, “right ok, how can I make this work” and then “how can I make this work as fast as a laptop”….
LikeLike